Expenses — Accounts Payable and Paid Accounts
NOTES: All expenses, with or without an invoice, must be recorded. This includes salaries, bank fees, partner withdrawals, minor maintenance, and other expenses.No amount should leave the store without being recorded. For expenses without an invoice, use a receipt book and enter the reason for the withdrawal, the date, and the amount. This ensures that all transactions are correctly recorded in Accounts Payable.
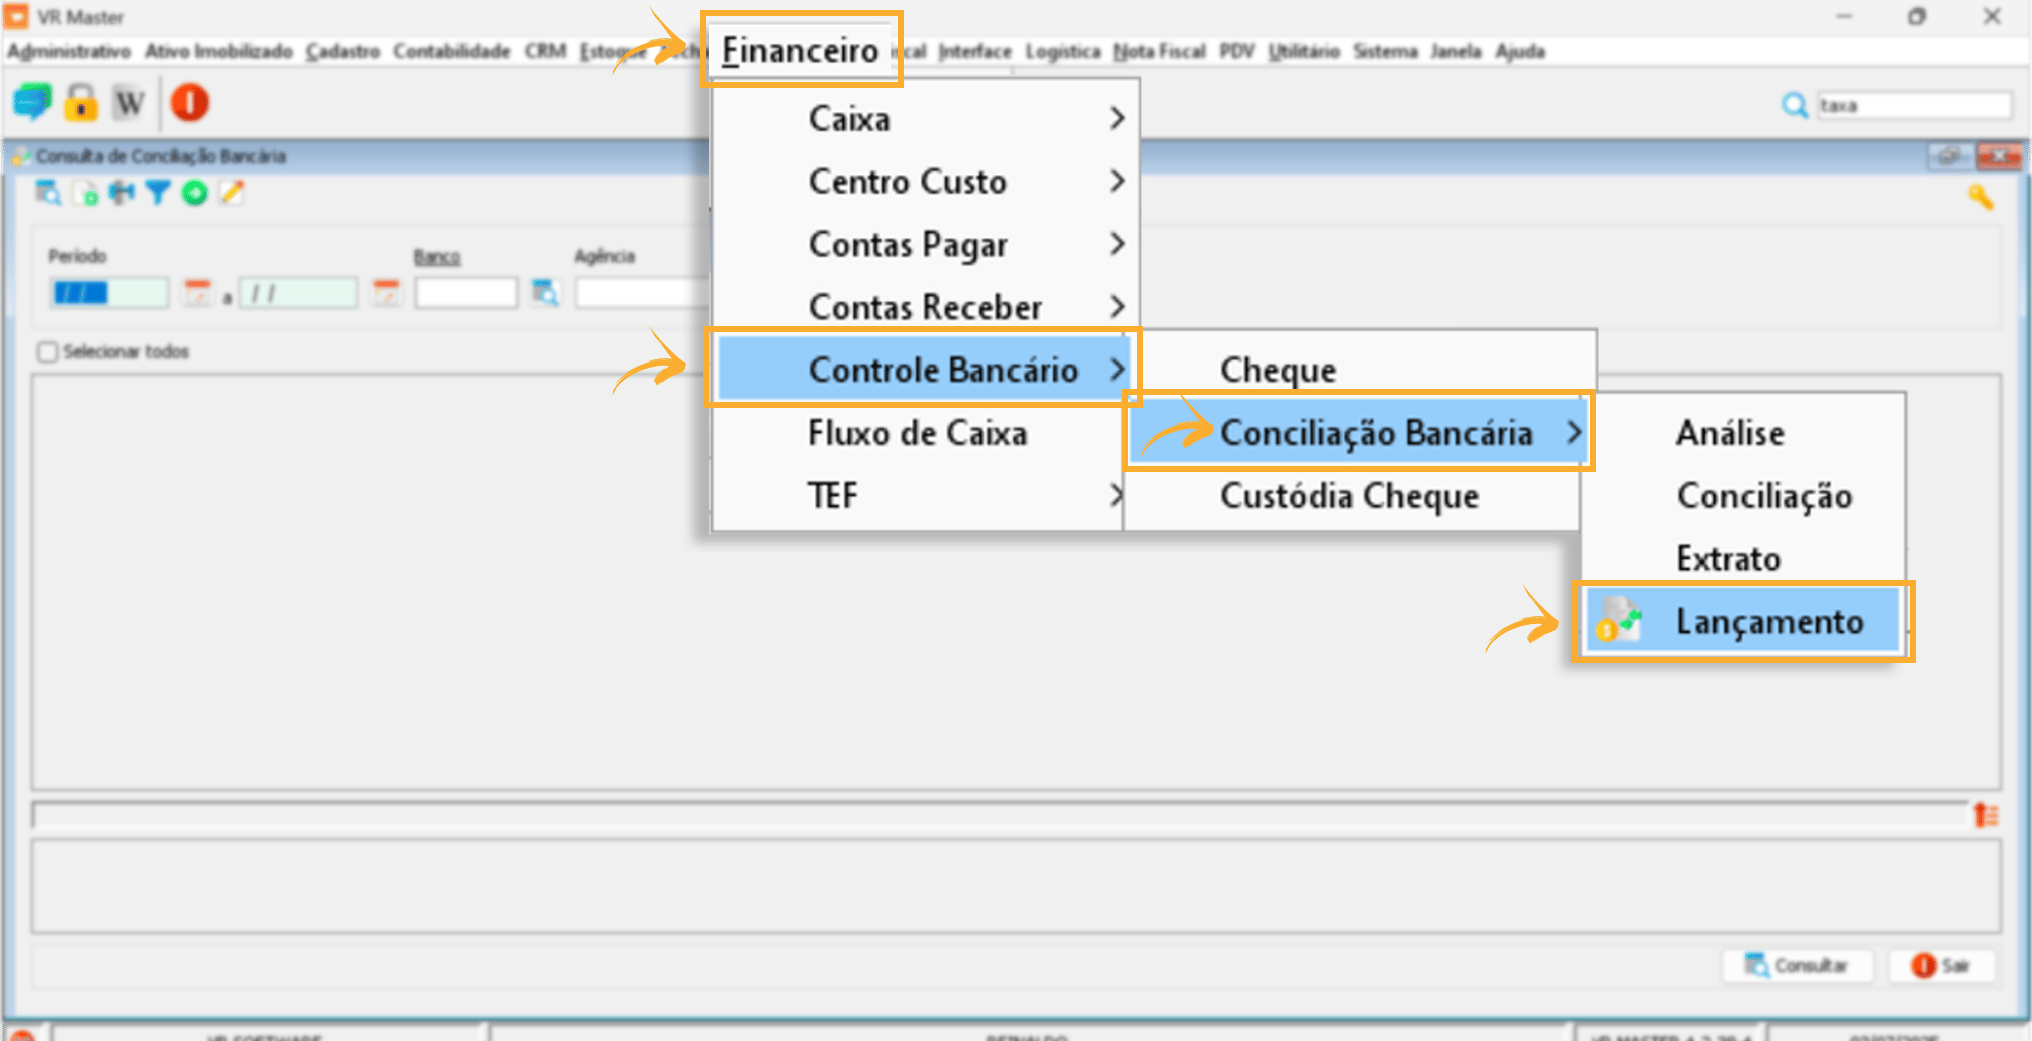
- Access VR Master and follow the procedure below:
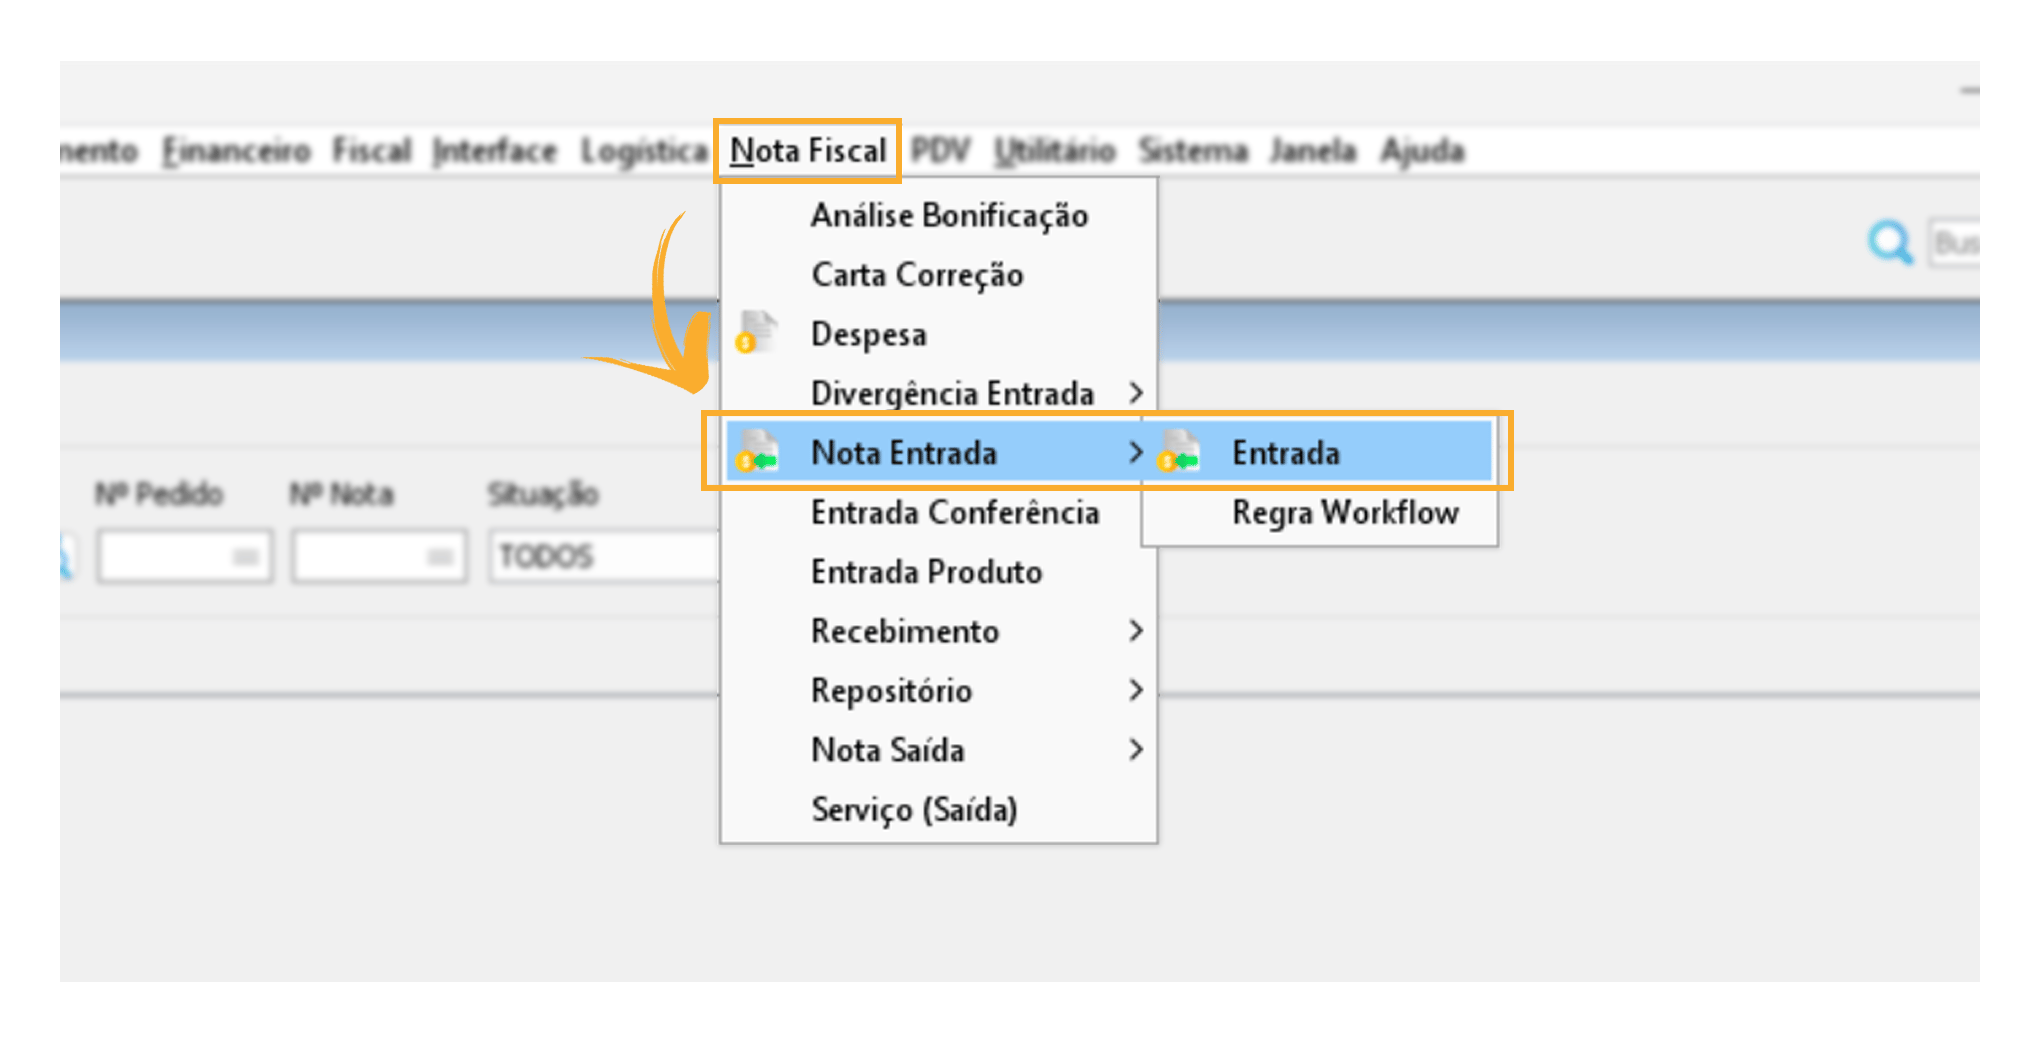
- Use a configured entry type with the posting type set to Expense:
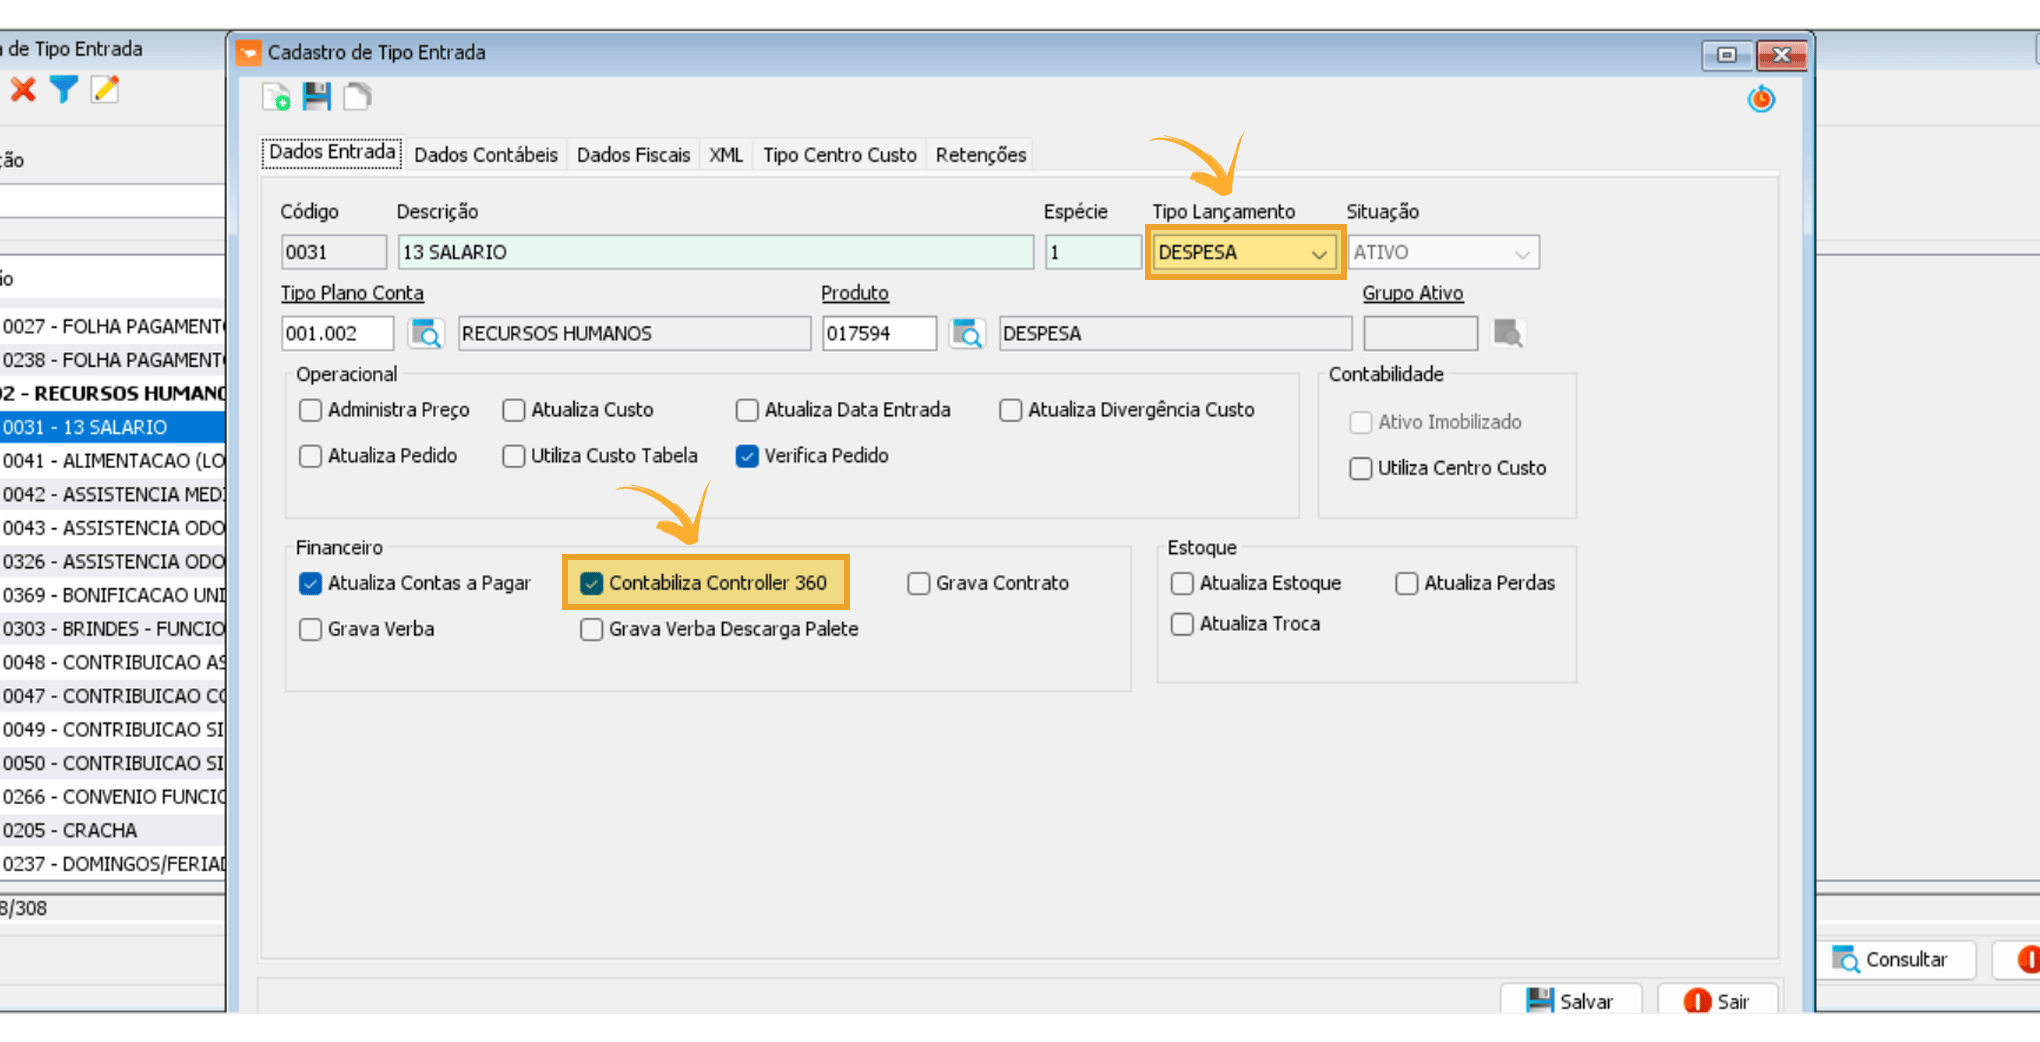
- This will update Accounts Payable > Supplier.
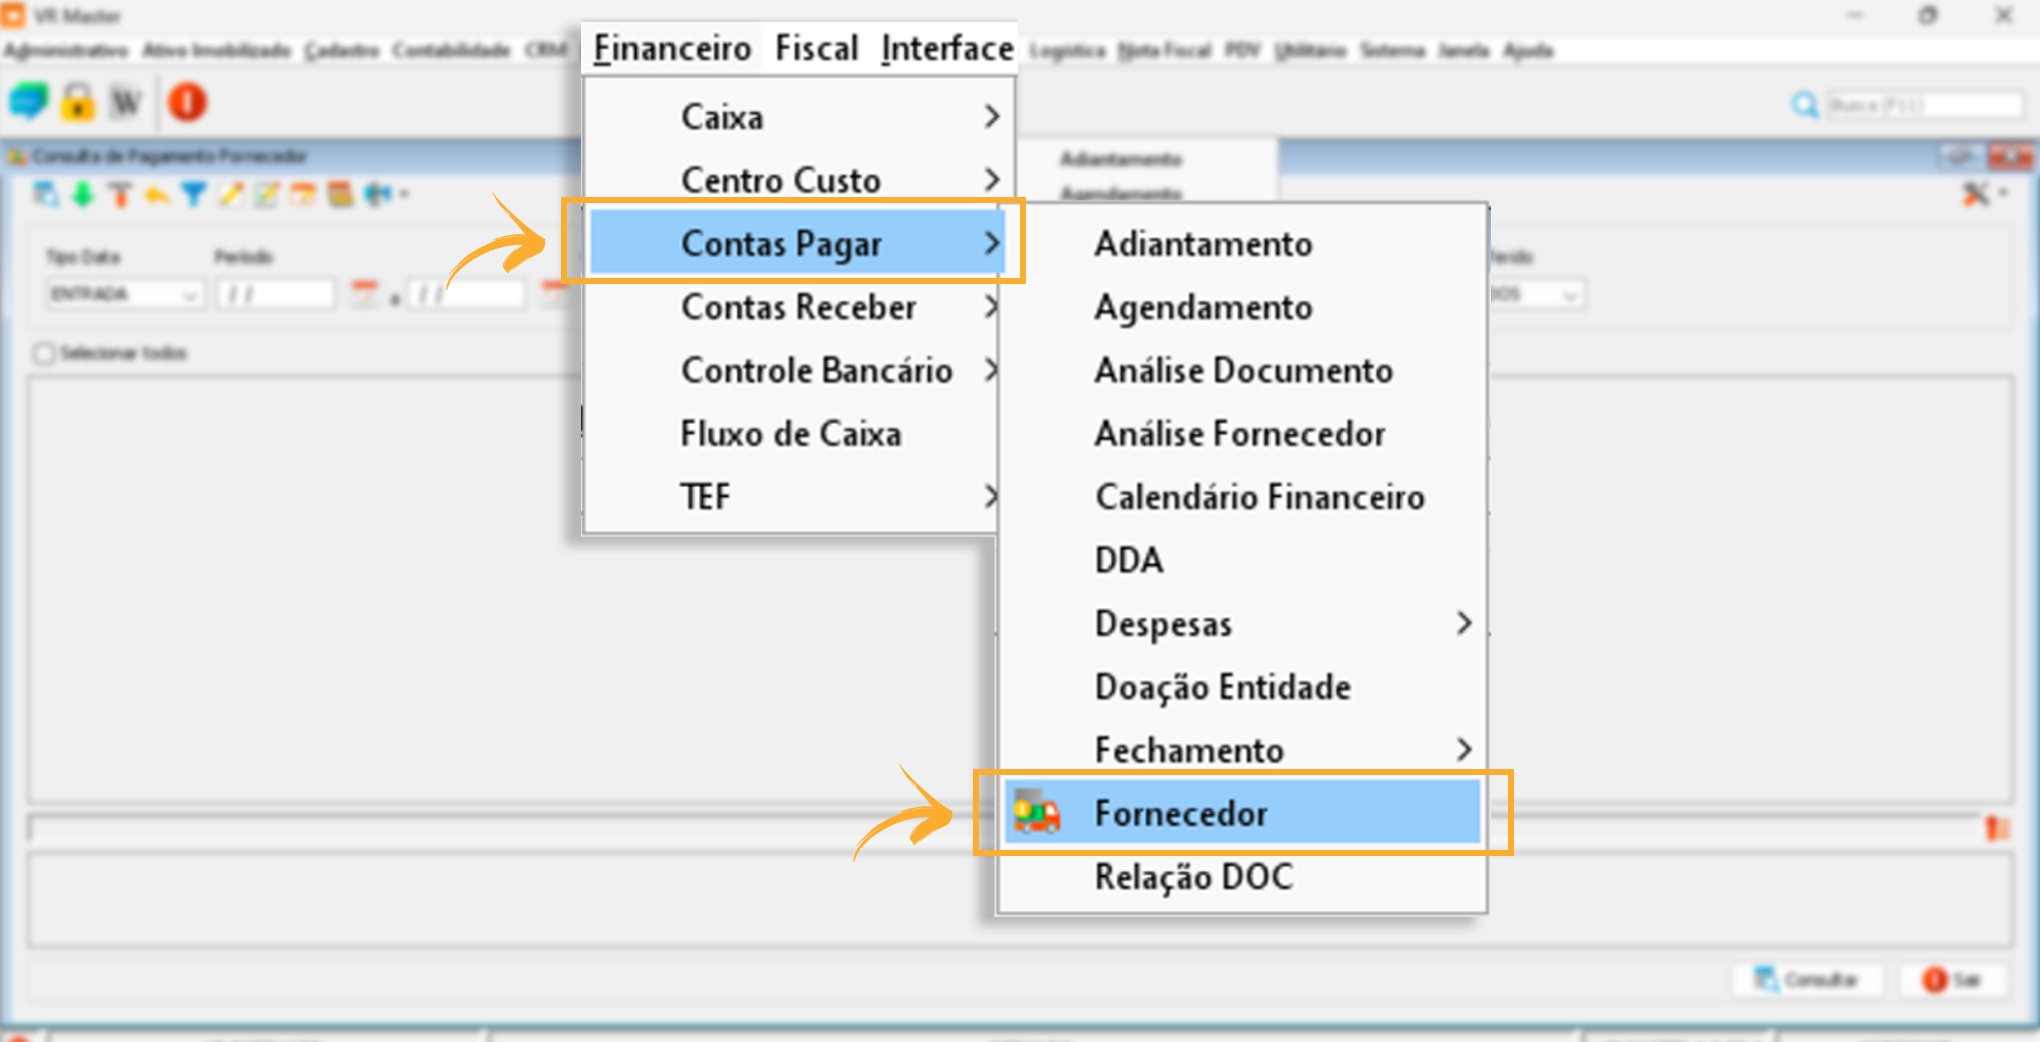
- Enter all expenses under: Financial > Accounts Payable > Expenses > Other Expenses, also completing the Supplier field, as shown in the image for step 3.
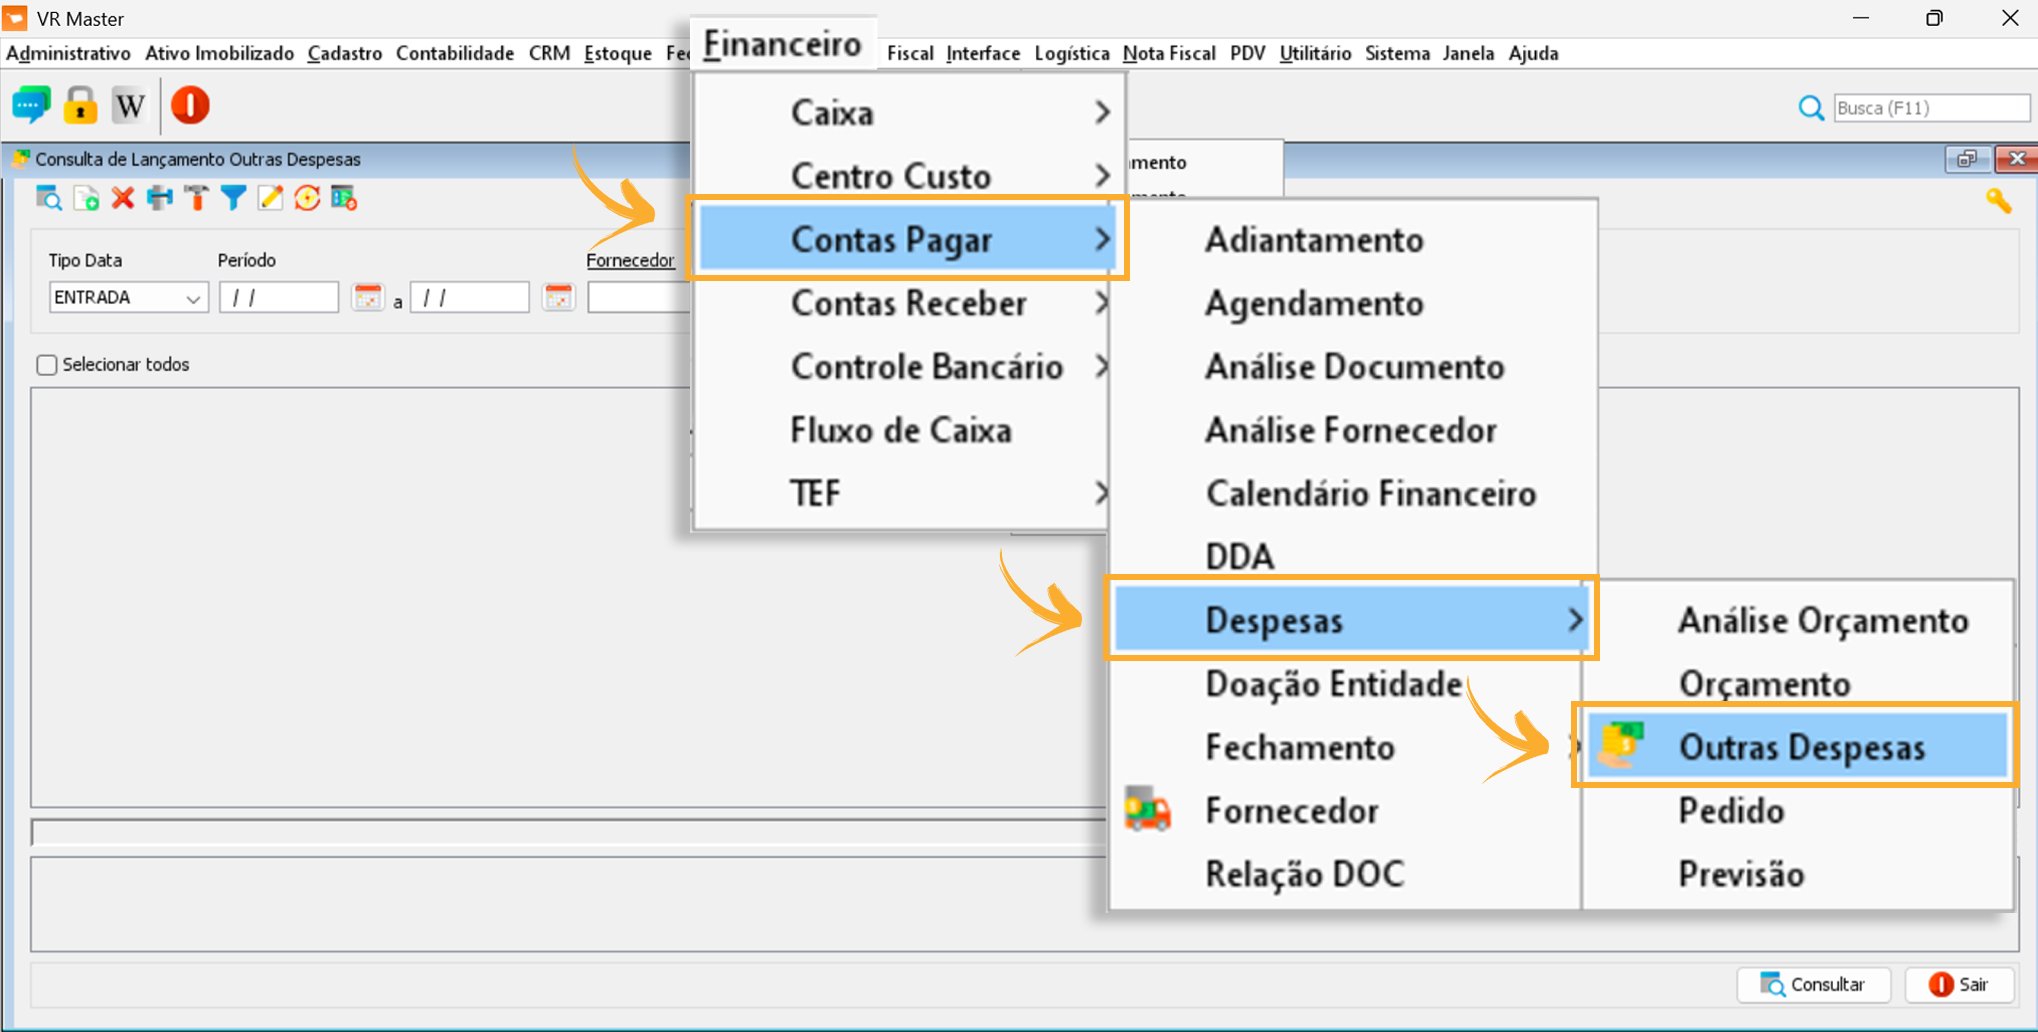
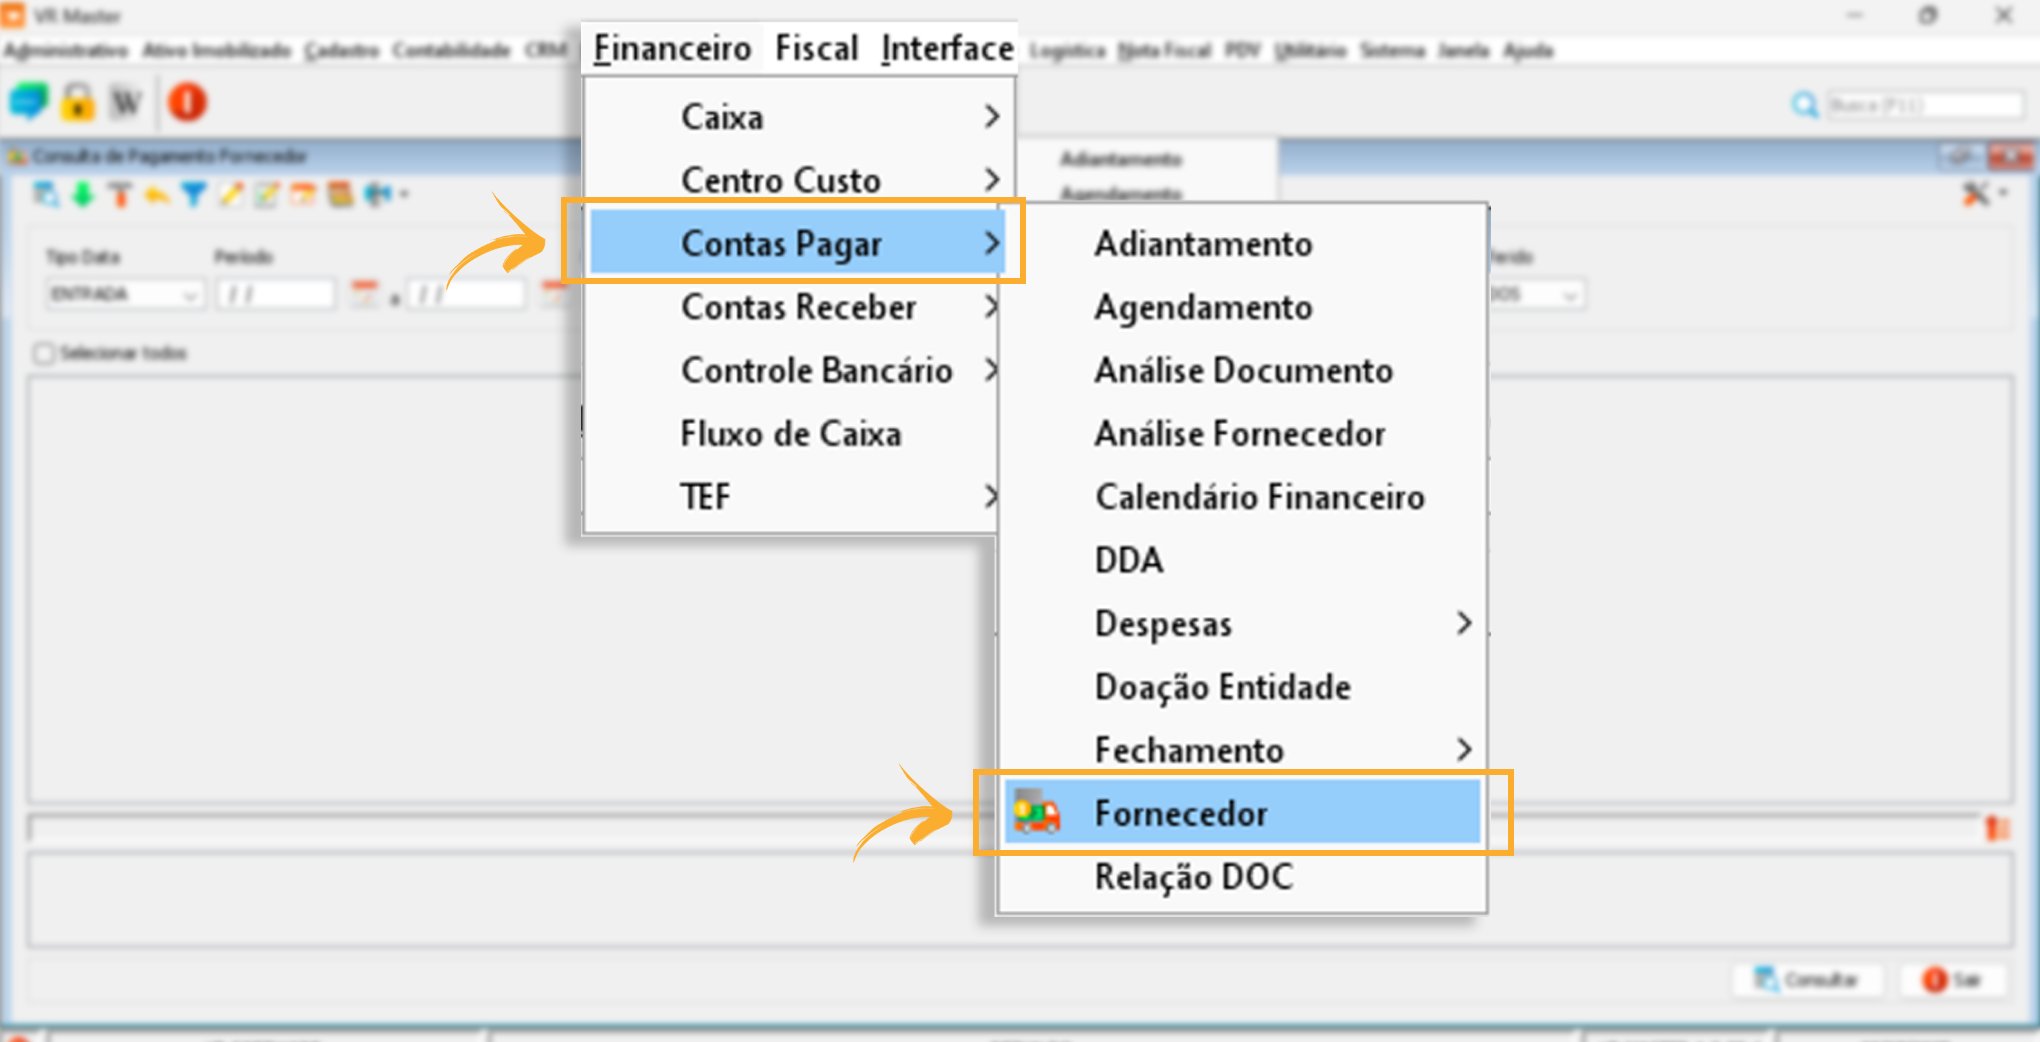
- When the expense is paid, access: Accounts Payable > Supplier. Locate the expense > Select it > Click the green downward arrow or press Alt + B > Enter the exact payment date > Click Settle. If the payment was made in cash, settle it through Treasury. If it was made through a bank account, select the bank used for the payment.
Suppliers — Purchase of Goods for Resale
- Access VR Master and follow the procedure below:
Invoice > Entry Invoice > Entry > Add
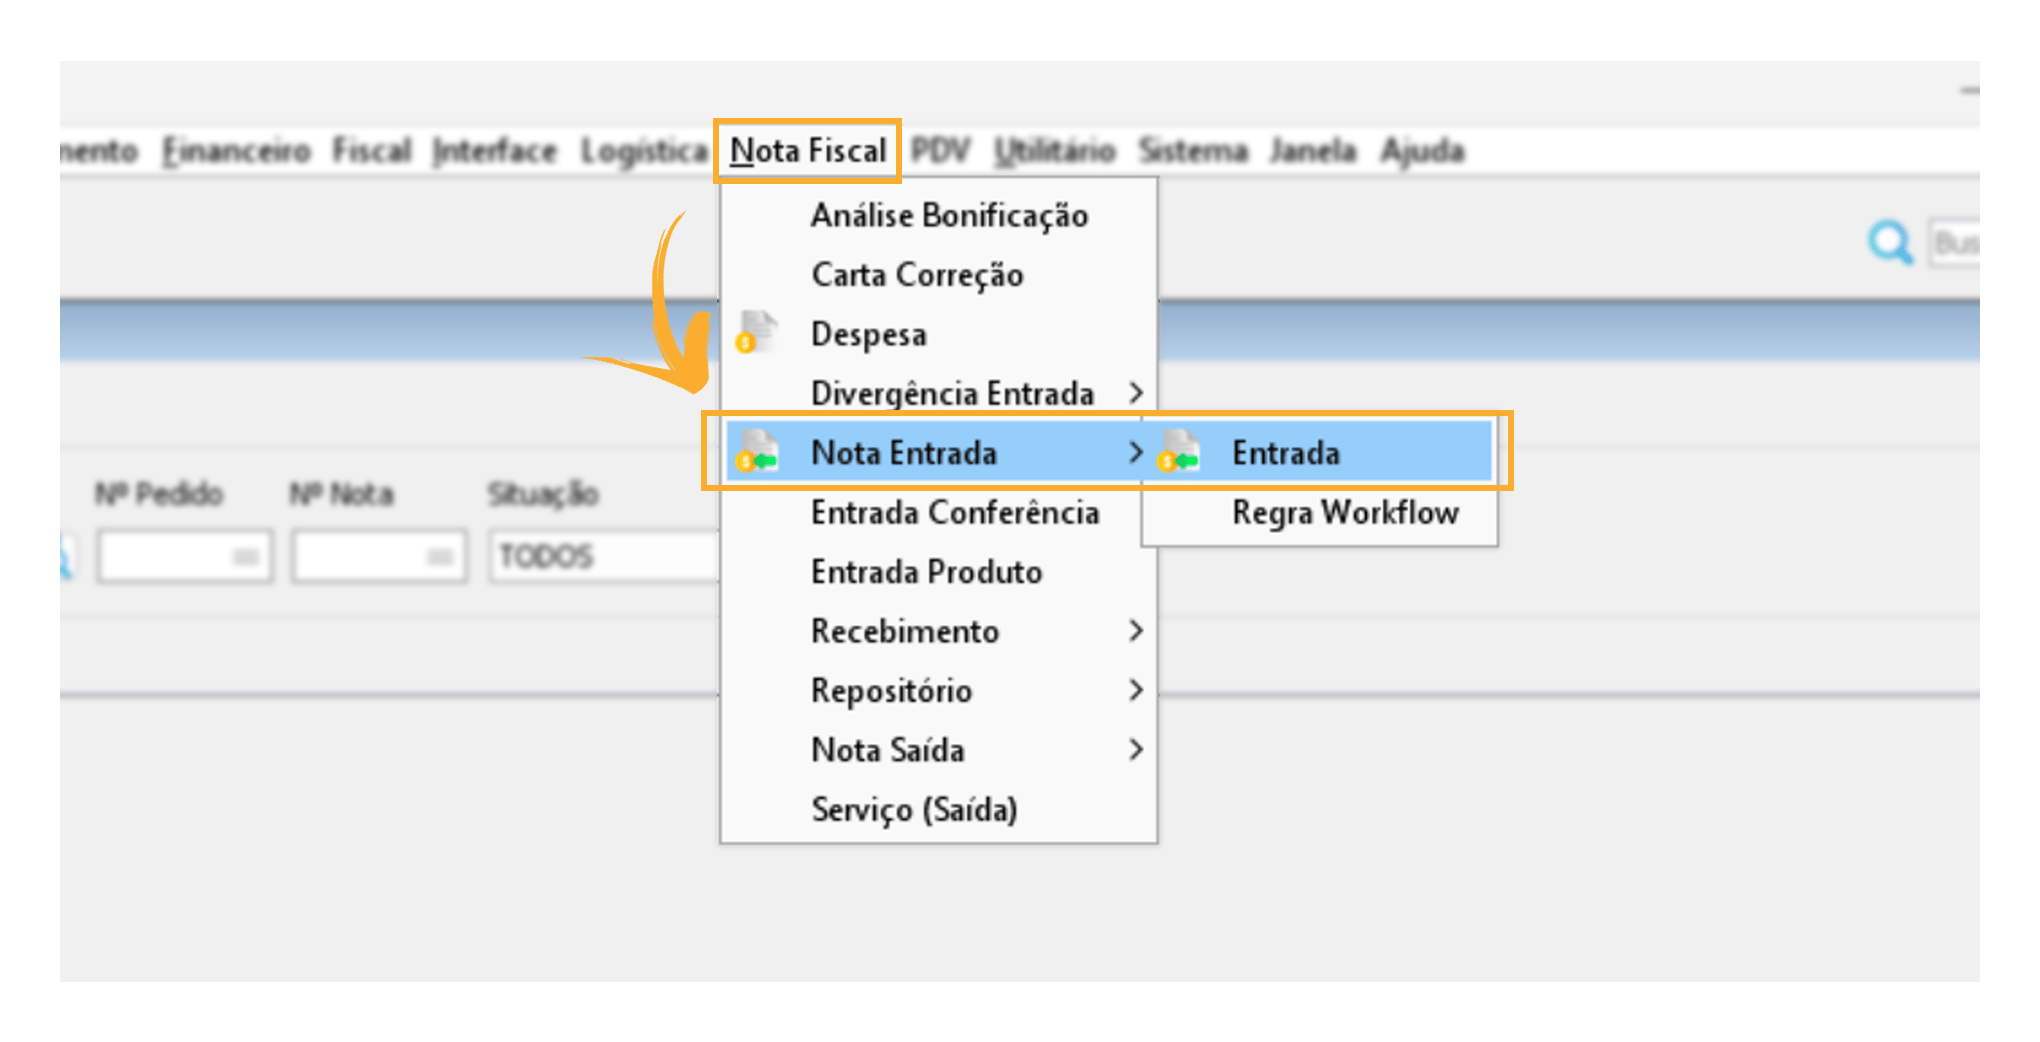
- Use a configured entry type with the posting type set to Entry, as shown in the image below. This will update Accounts Payable > Supplier.
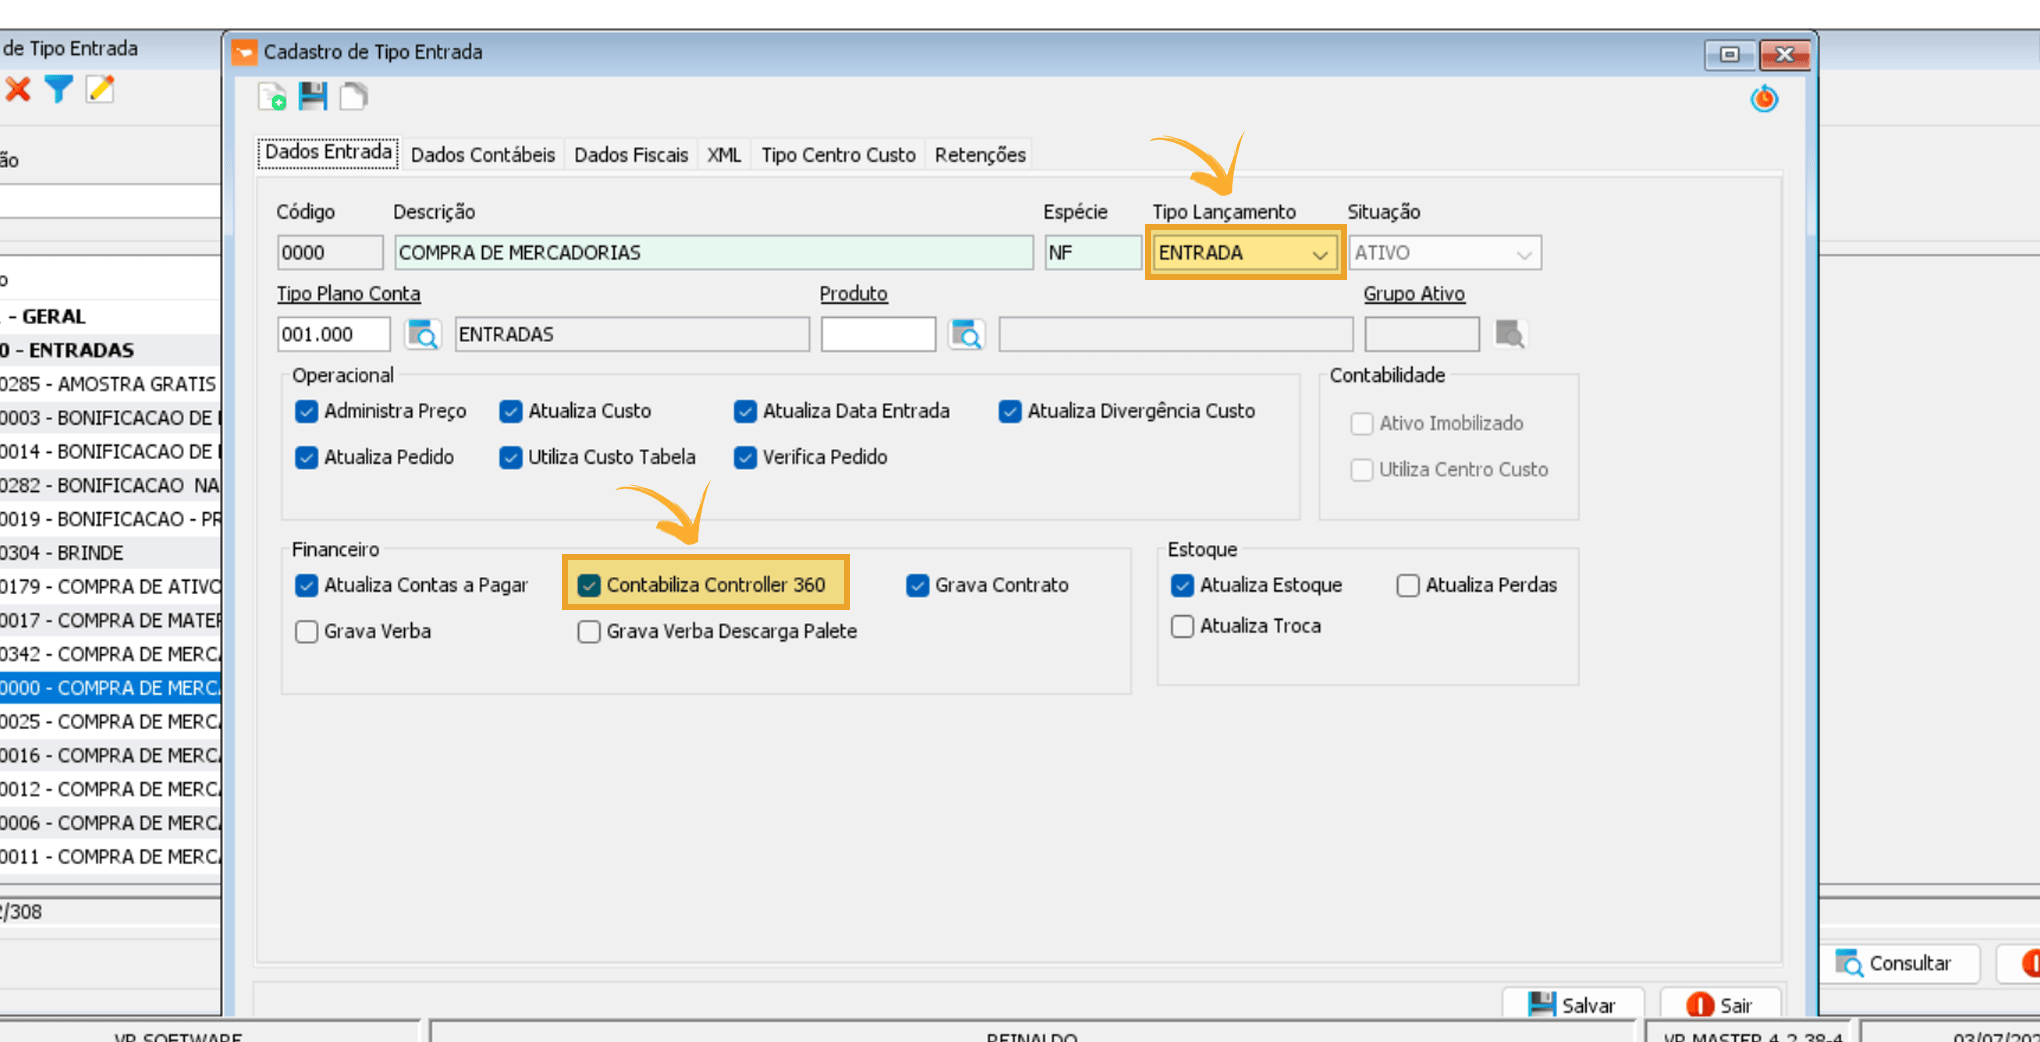
- This will update Accounts Payable > Supplier, as shown in the image below:
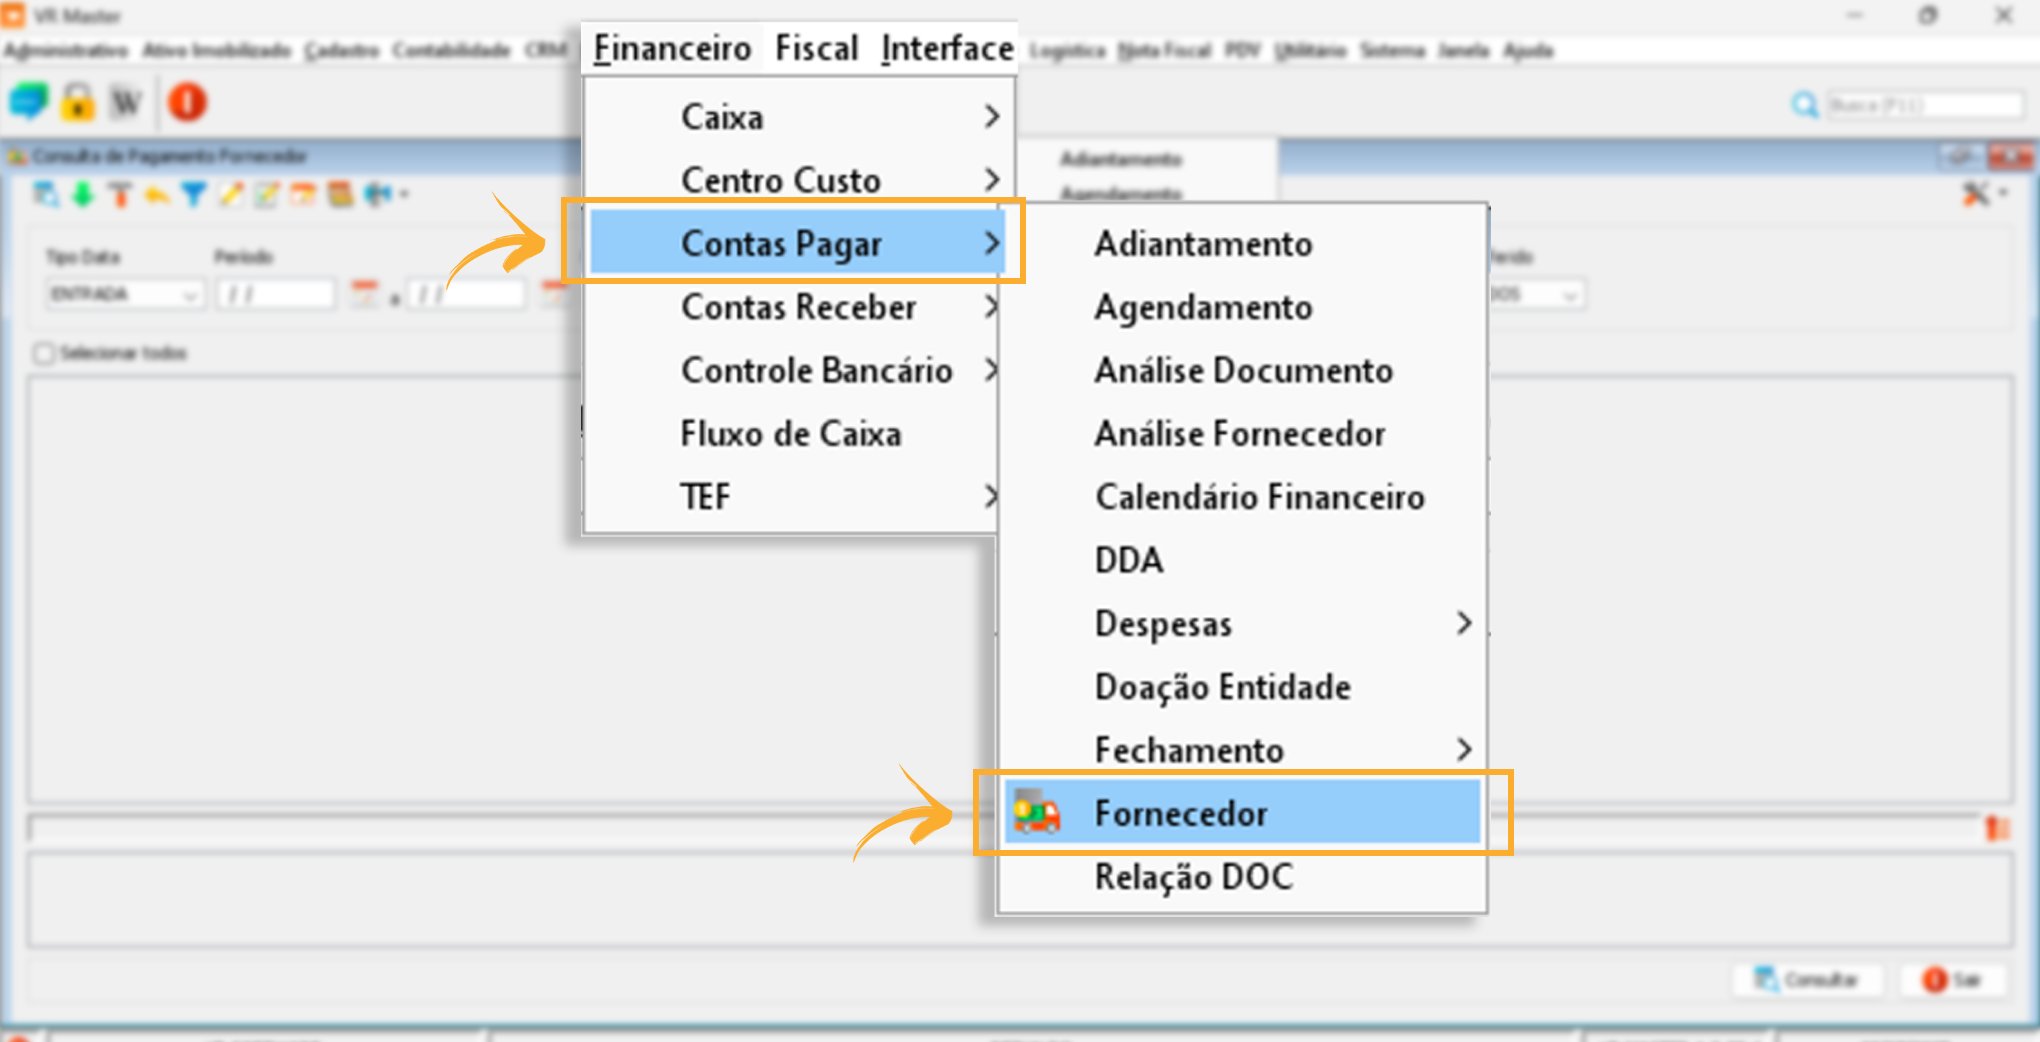
- When the supplier is paid, access: Accounts Payable > Supplier. Locate the supplier > Select it > Click the green downward arrow or press Alt + B > Enter the exact payment date > Click Settle. If the payment is made in cash, settle it through Treasury. If it is made through a bank account, select the bank used for the payment.
image
If a purchase is made without an invoice, record it using a specific entry type, updating Accounts Payable > Supplier. After payment, settle it according to the instructions above.
POS Sales — Accounts Receivable and Received Accounts
- Complete the three POS Closing steps so that the information is sent to Accounts Receivable. Follow the sequence below:
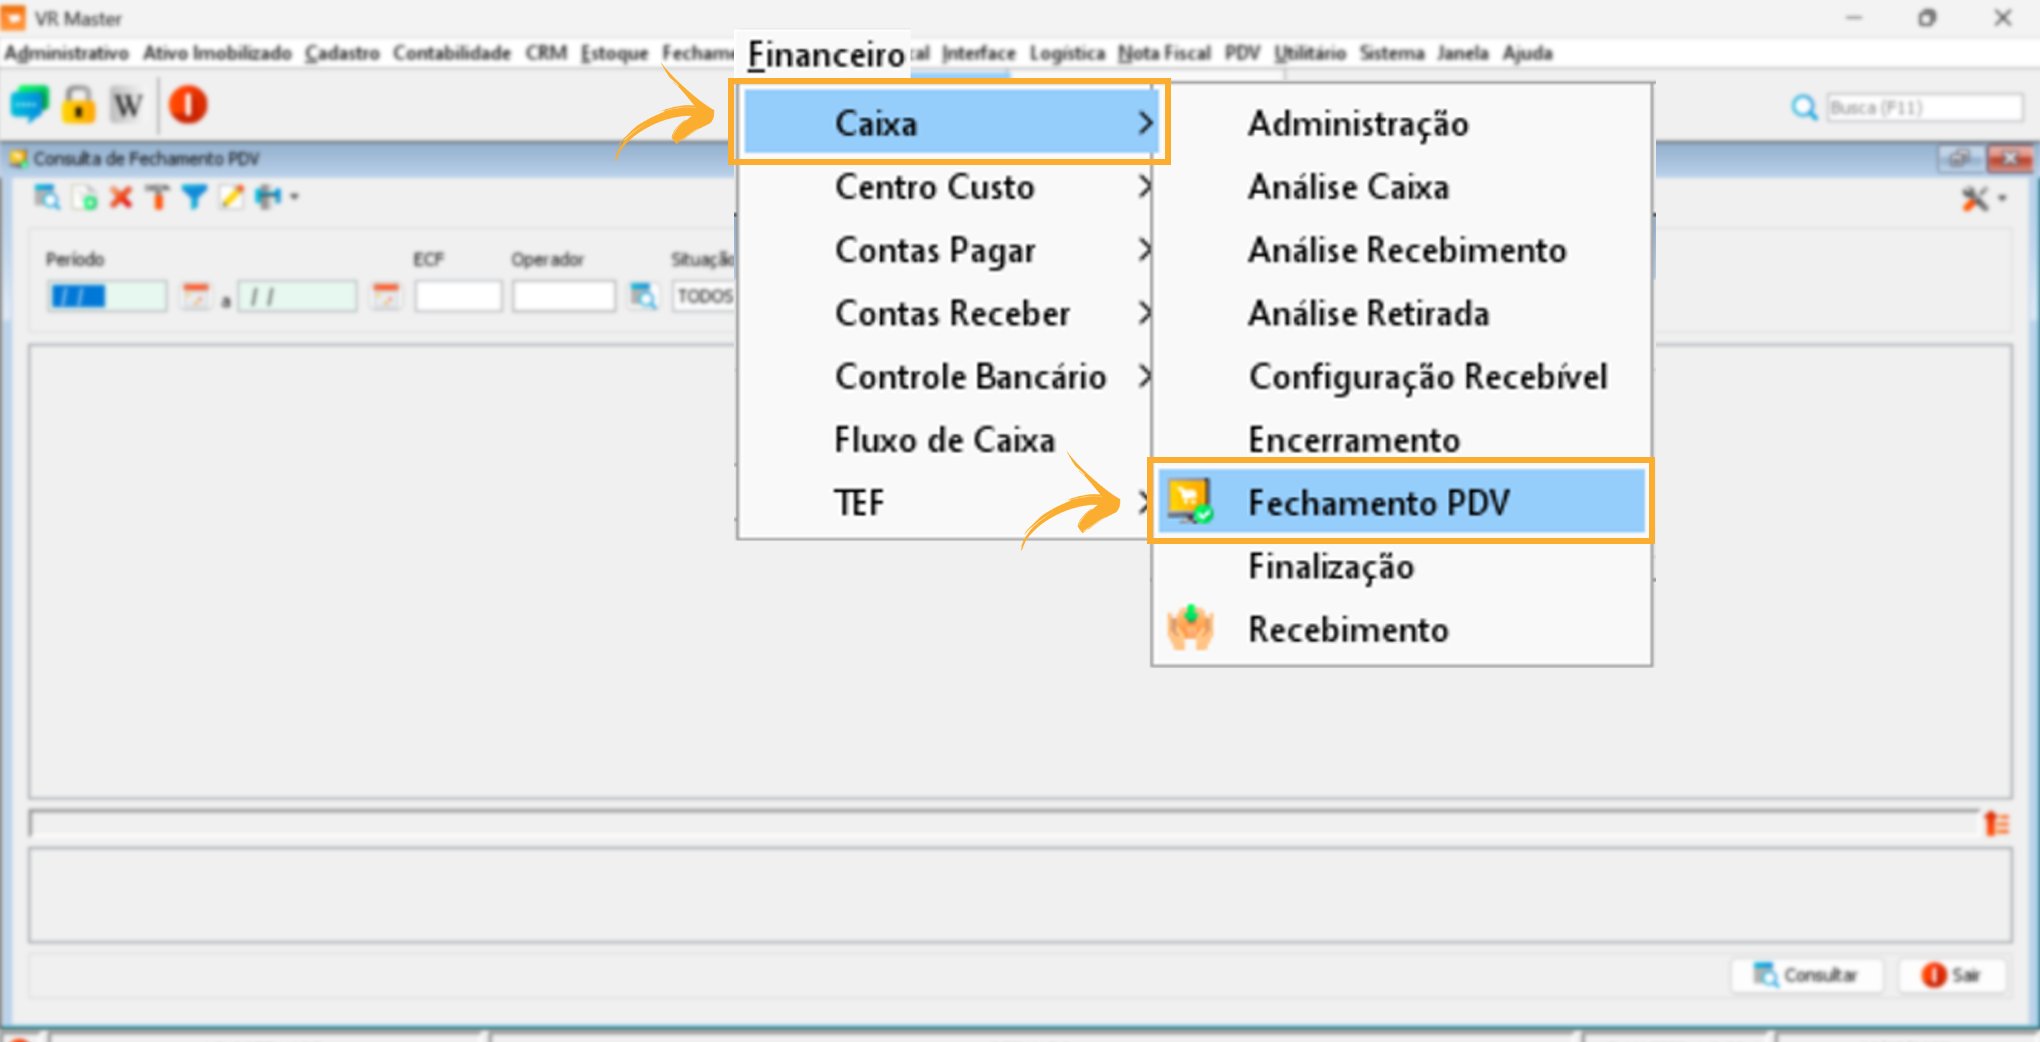
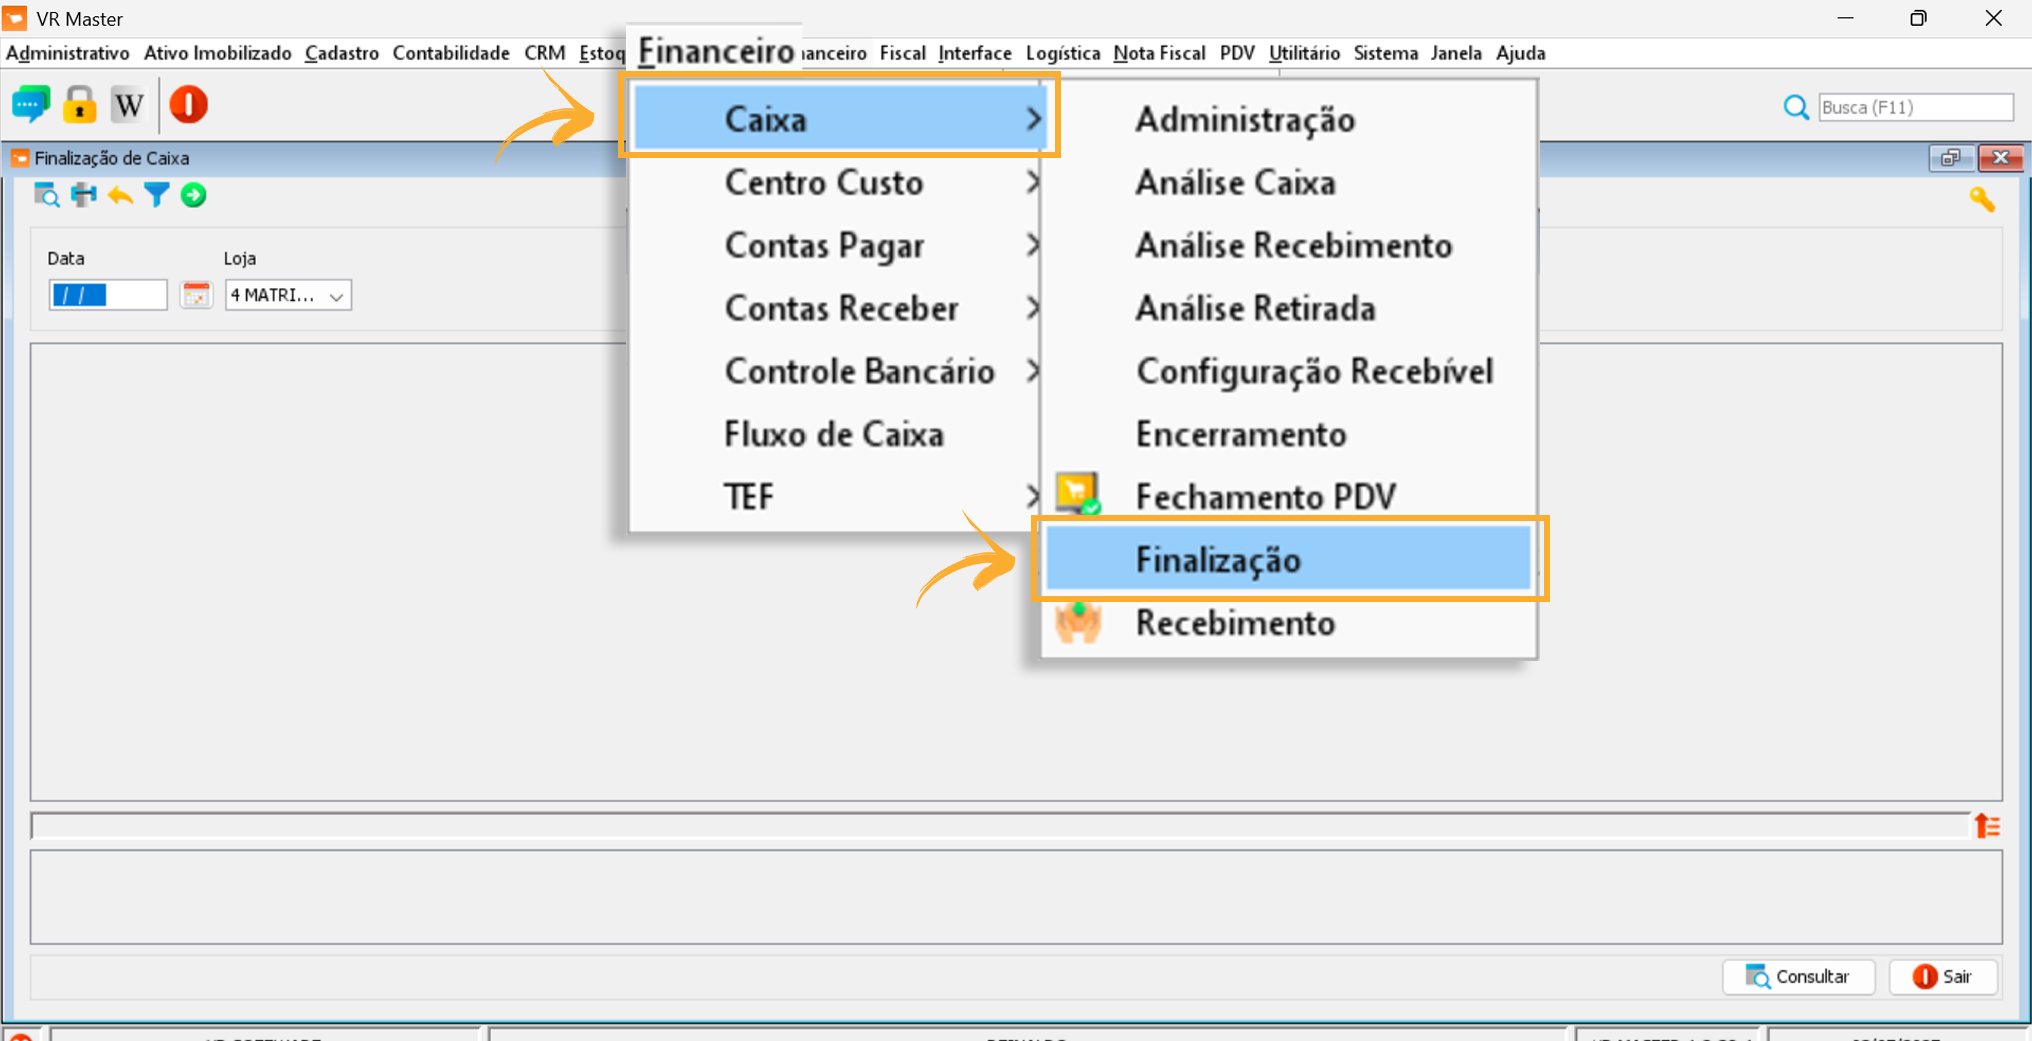
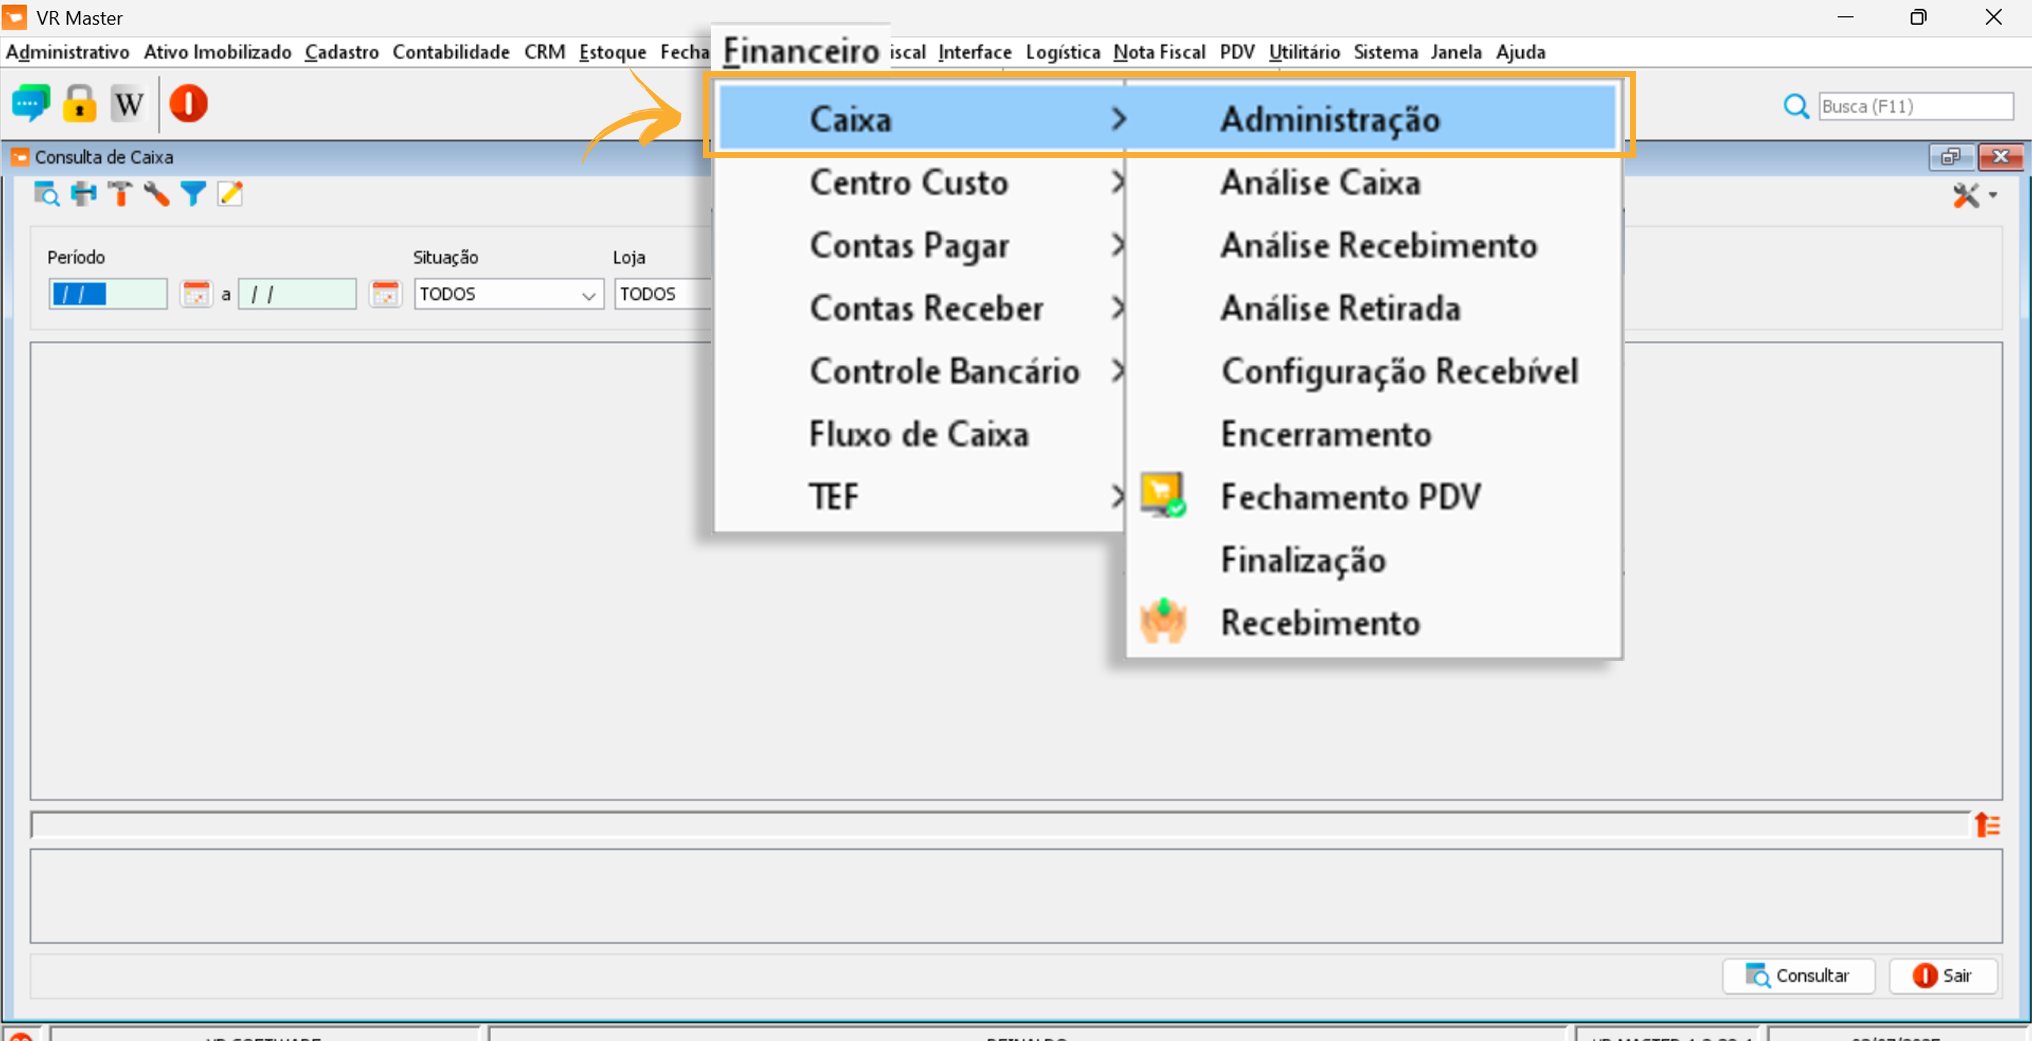
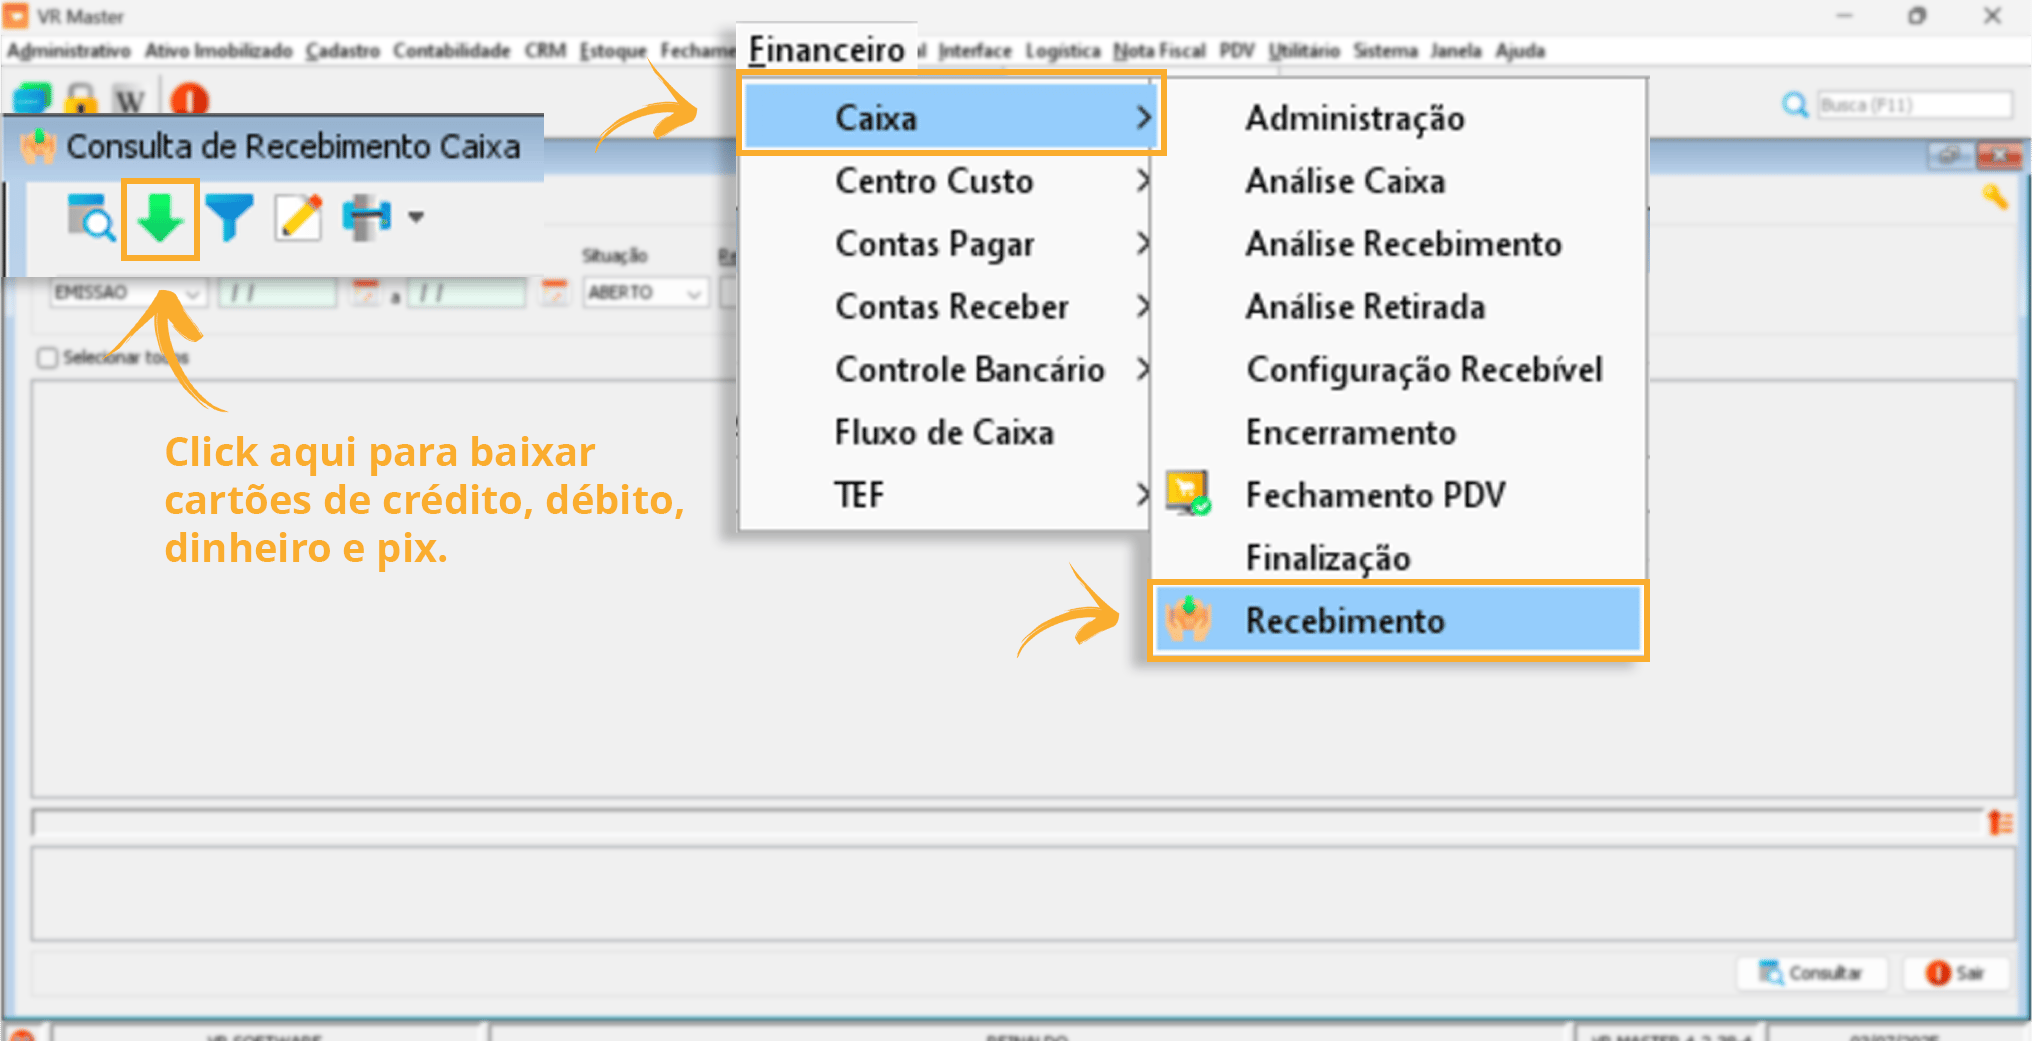
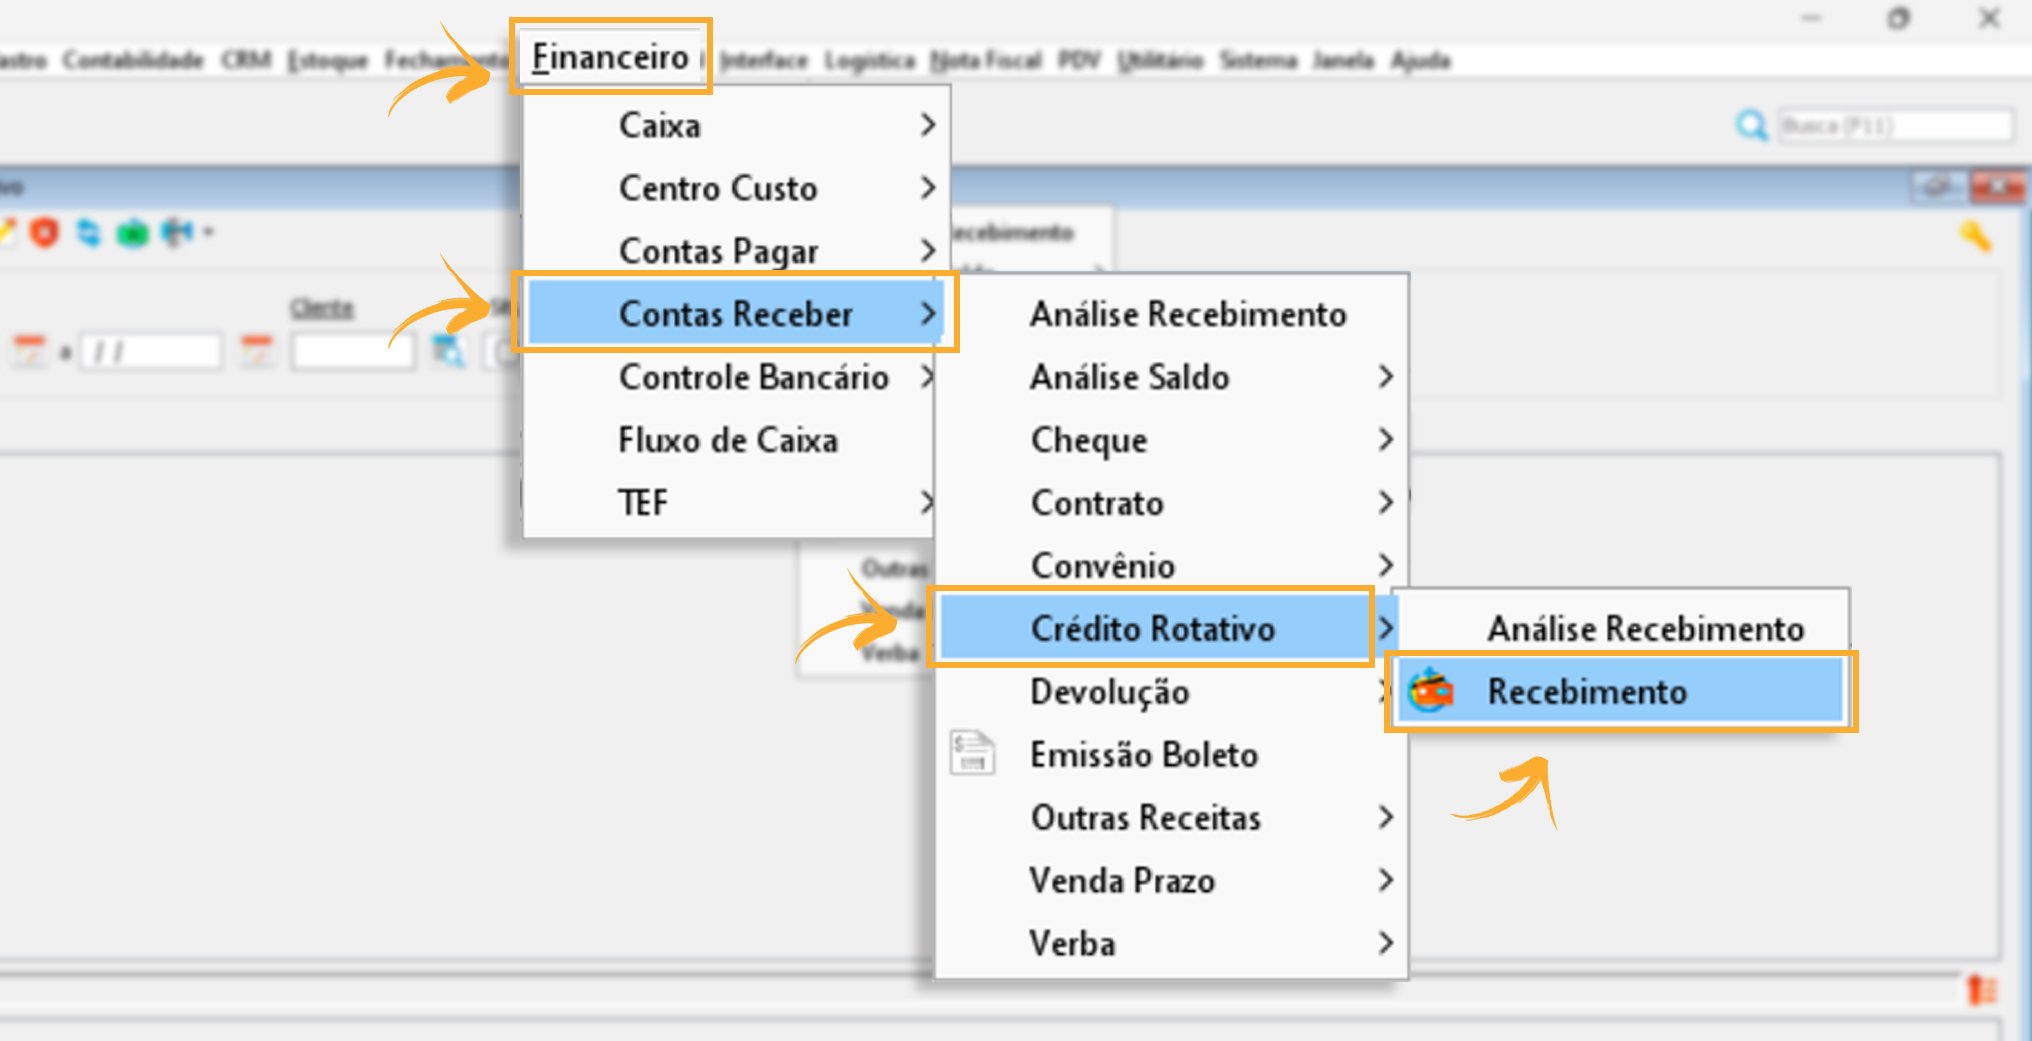
NF-e Sales
- Invoice > Outbound Invoice > Issue
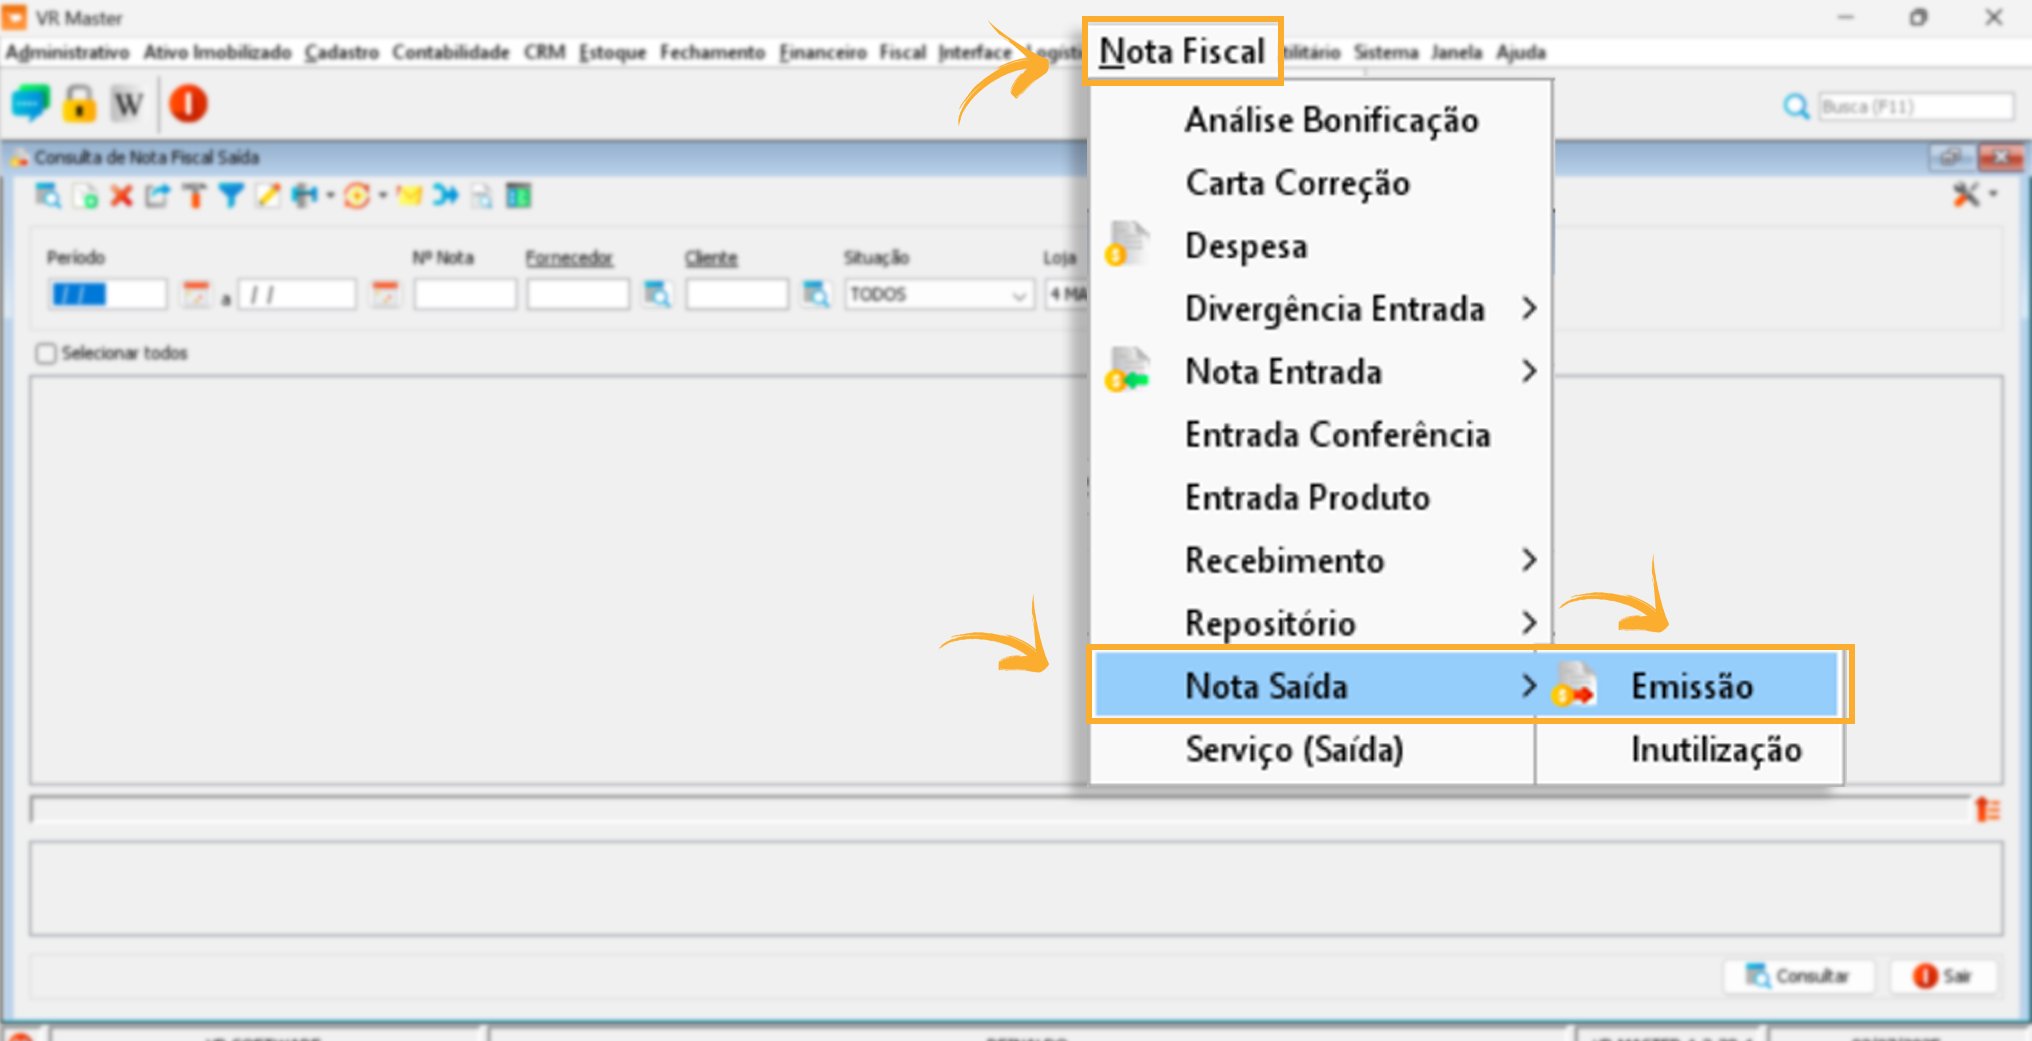
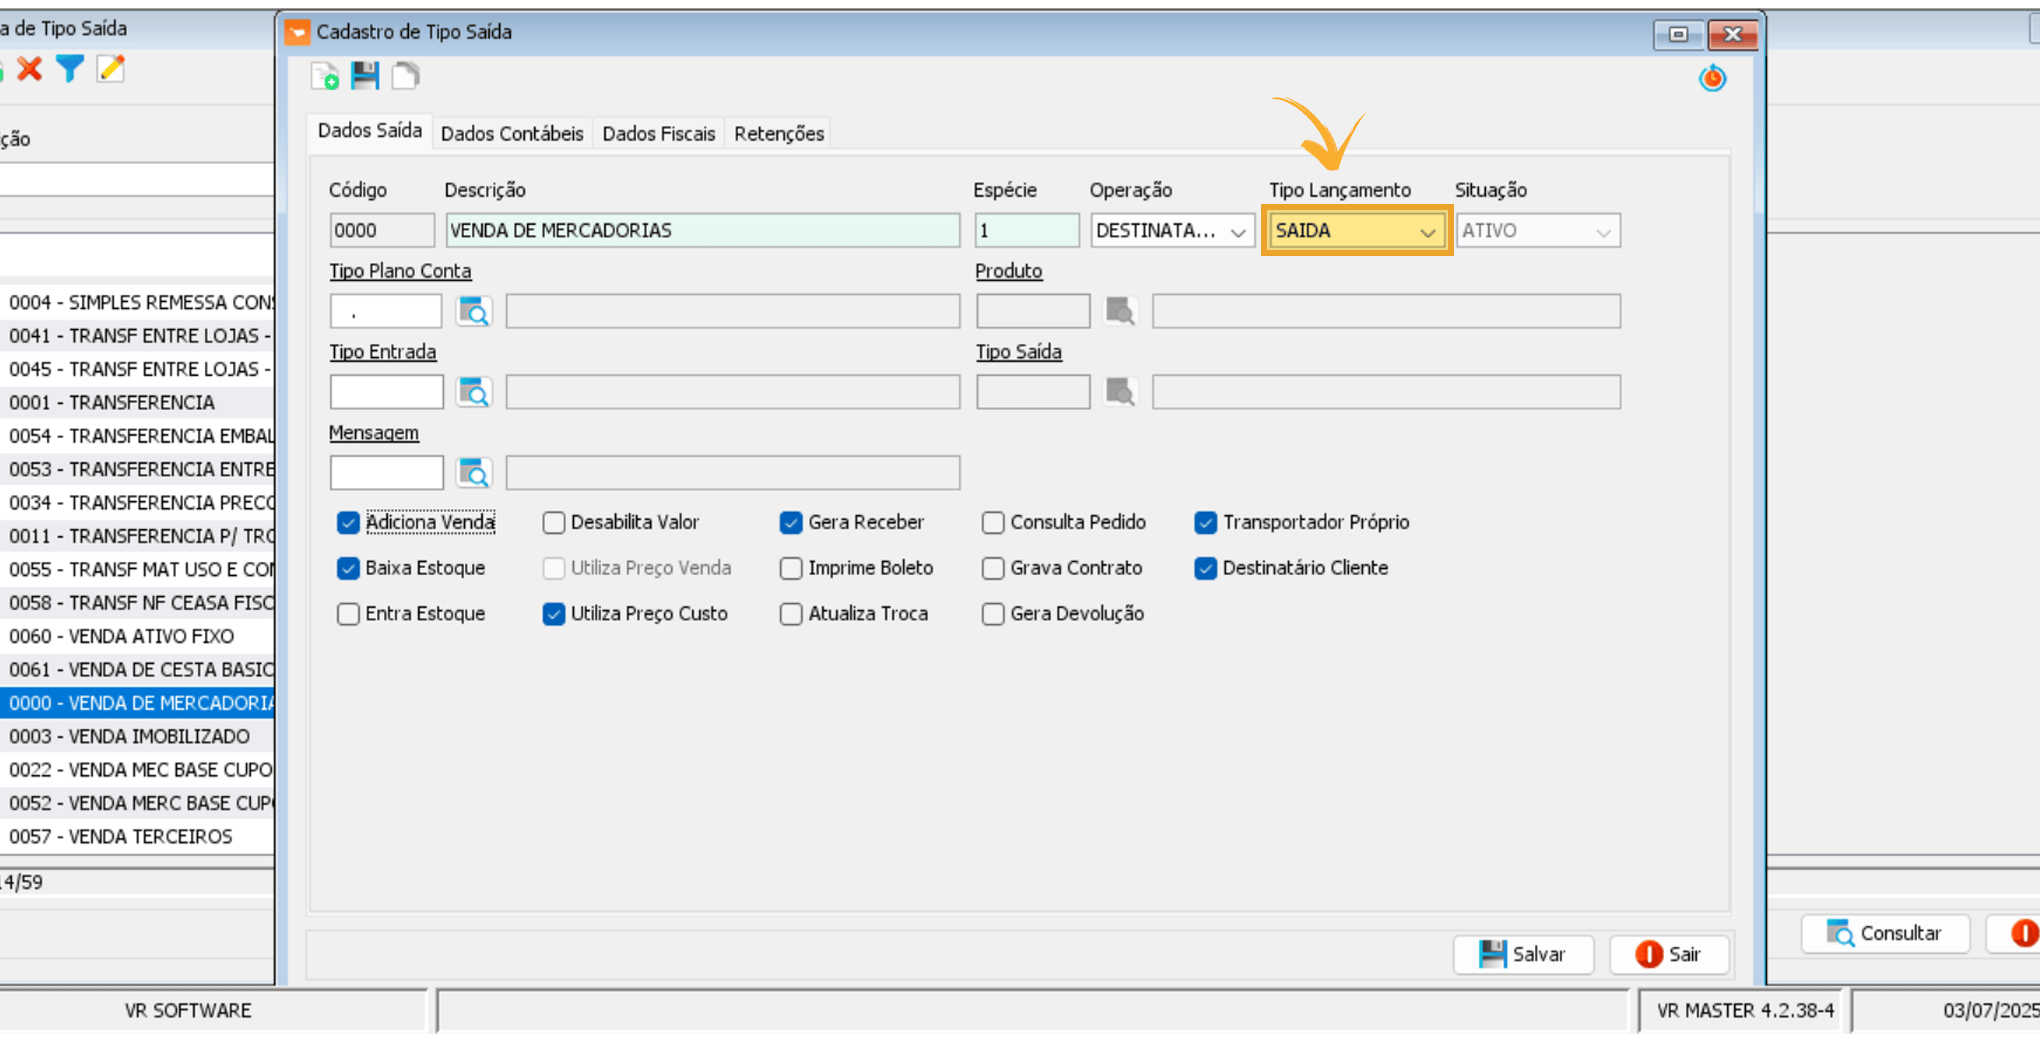
- When issuing a sales invoice that was not processed through the POS, use an outbound type configured with the following options: Add Sale > Reduce Inventory > Generate Receivable. This will record the amount in Accounts Receivable. After receiving the payment, settle it according to the instructions above.
Remember to configure the card fees and the banks used for bank reconciliation in the corresponding records.To simplify card reconciliation, which can be a time-consuming task, learn more about the VR Card Reconciliation tool.
Bank Reconciliation
- Bank reconciliation is essential to ensure that all incoming and outgoing funds have been recorded correctly.