- Portal
- Mobile
How to Create a Purchase Plan
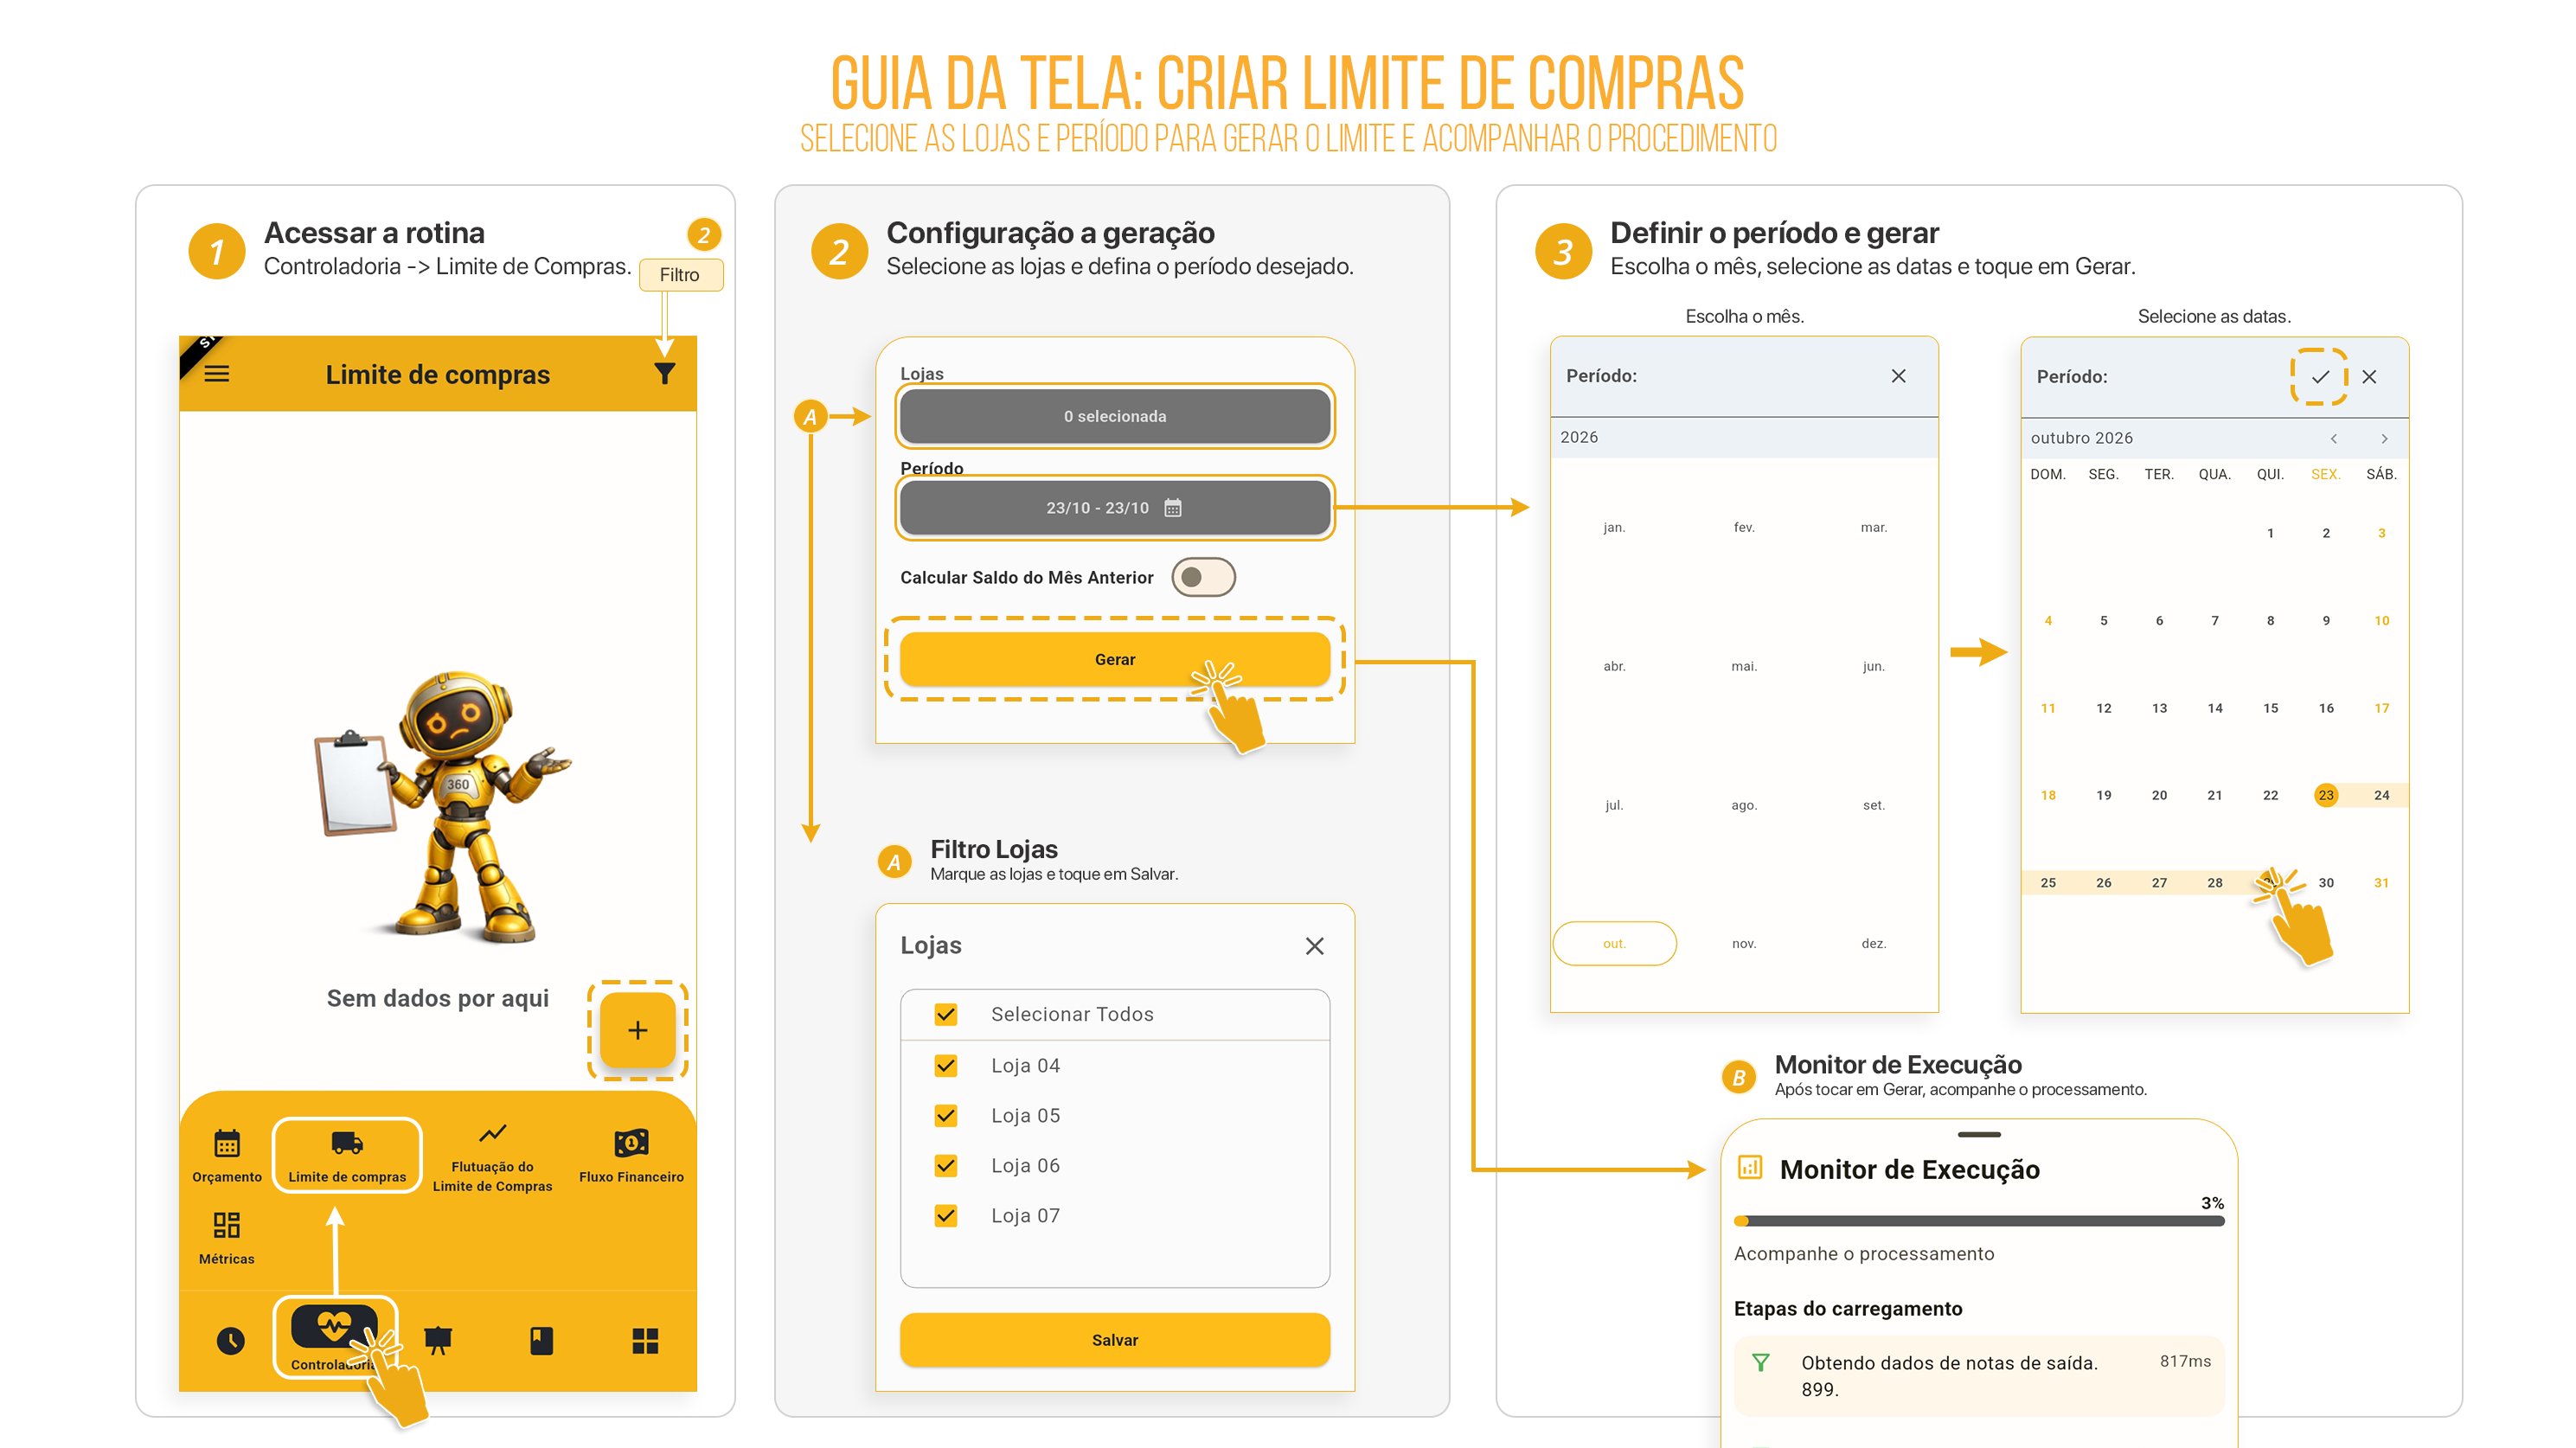
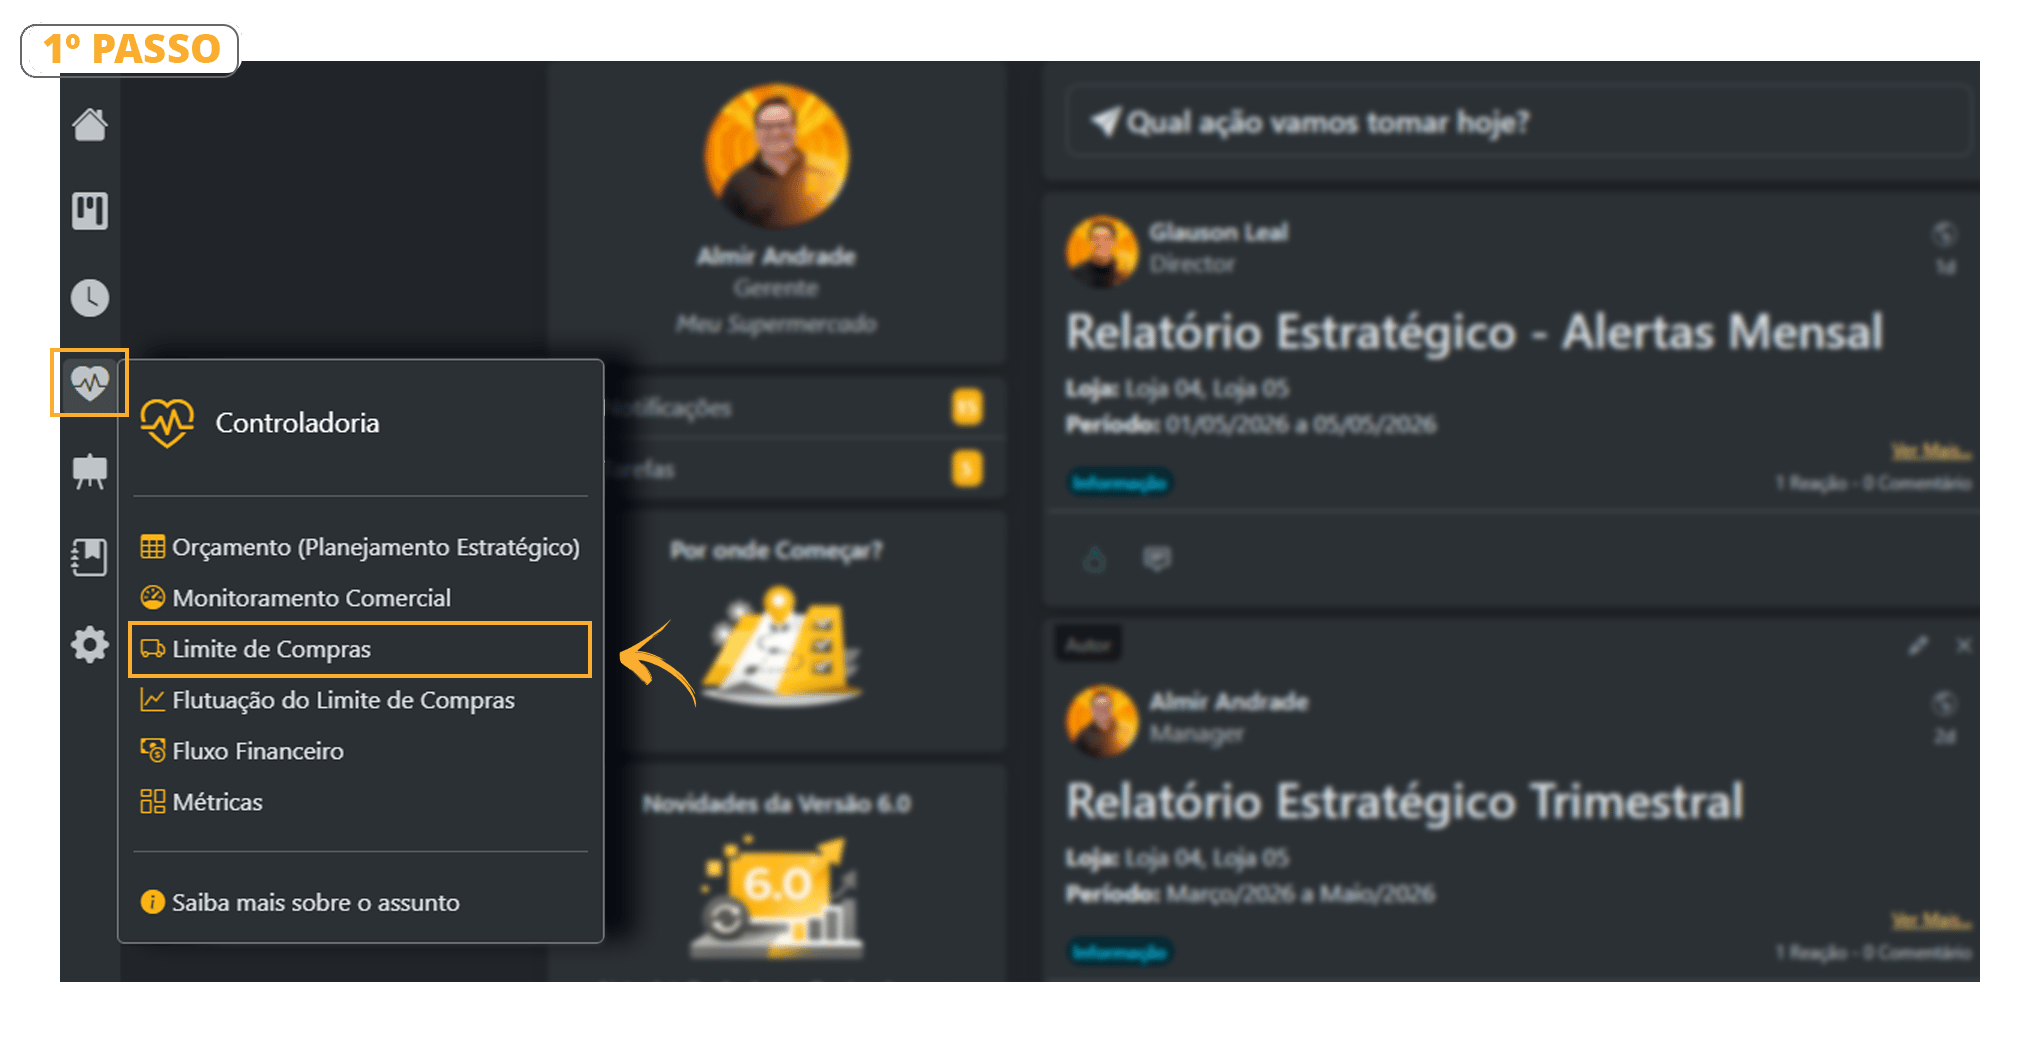
To maintain a healthy and balanced purchase plan, we recommend creating it WEEKLY. Every Monday, access the Purchase Limit and set the period from Monday to Sunday.Follow the step-by-step instructions below to generate the Purchase Limit.- Controllership > Purchase Limit
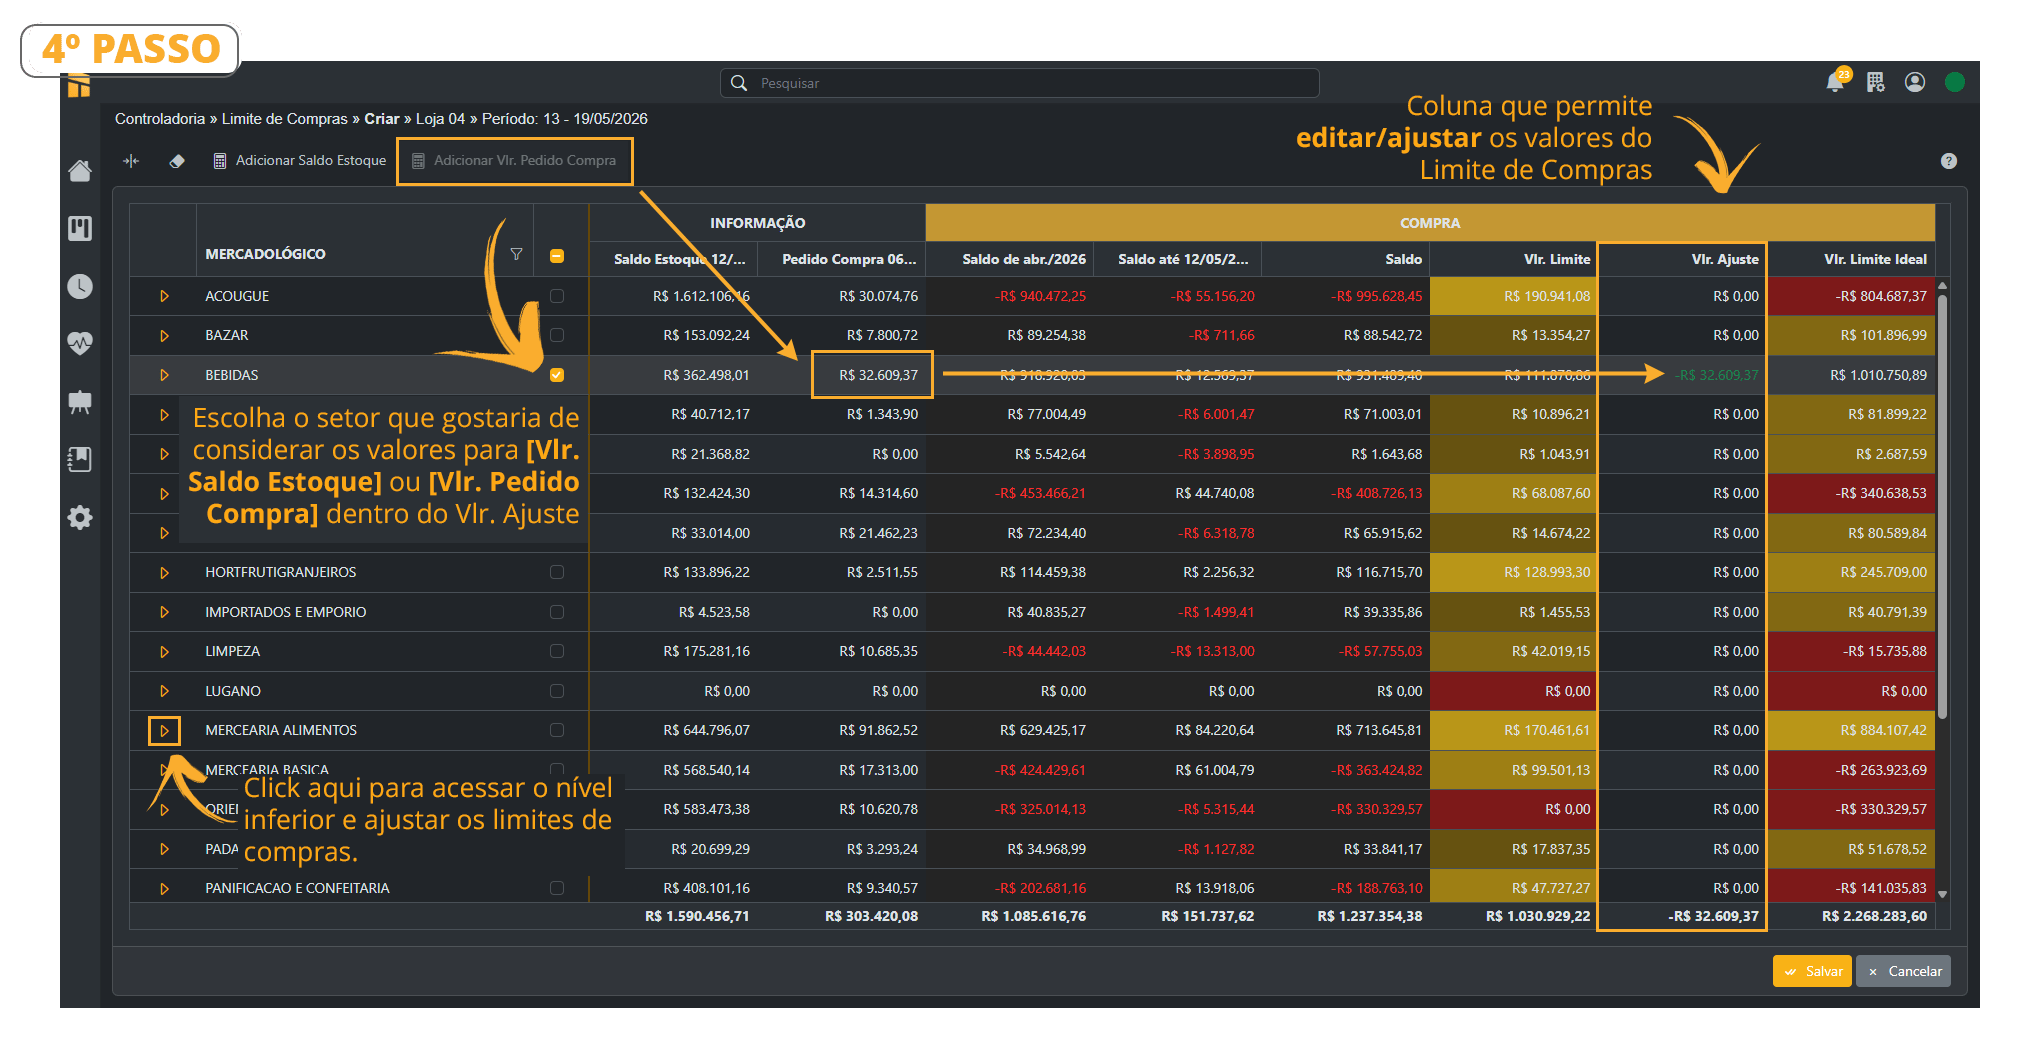
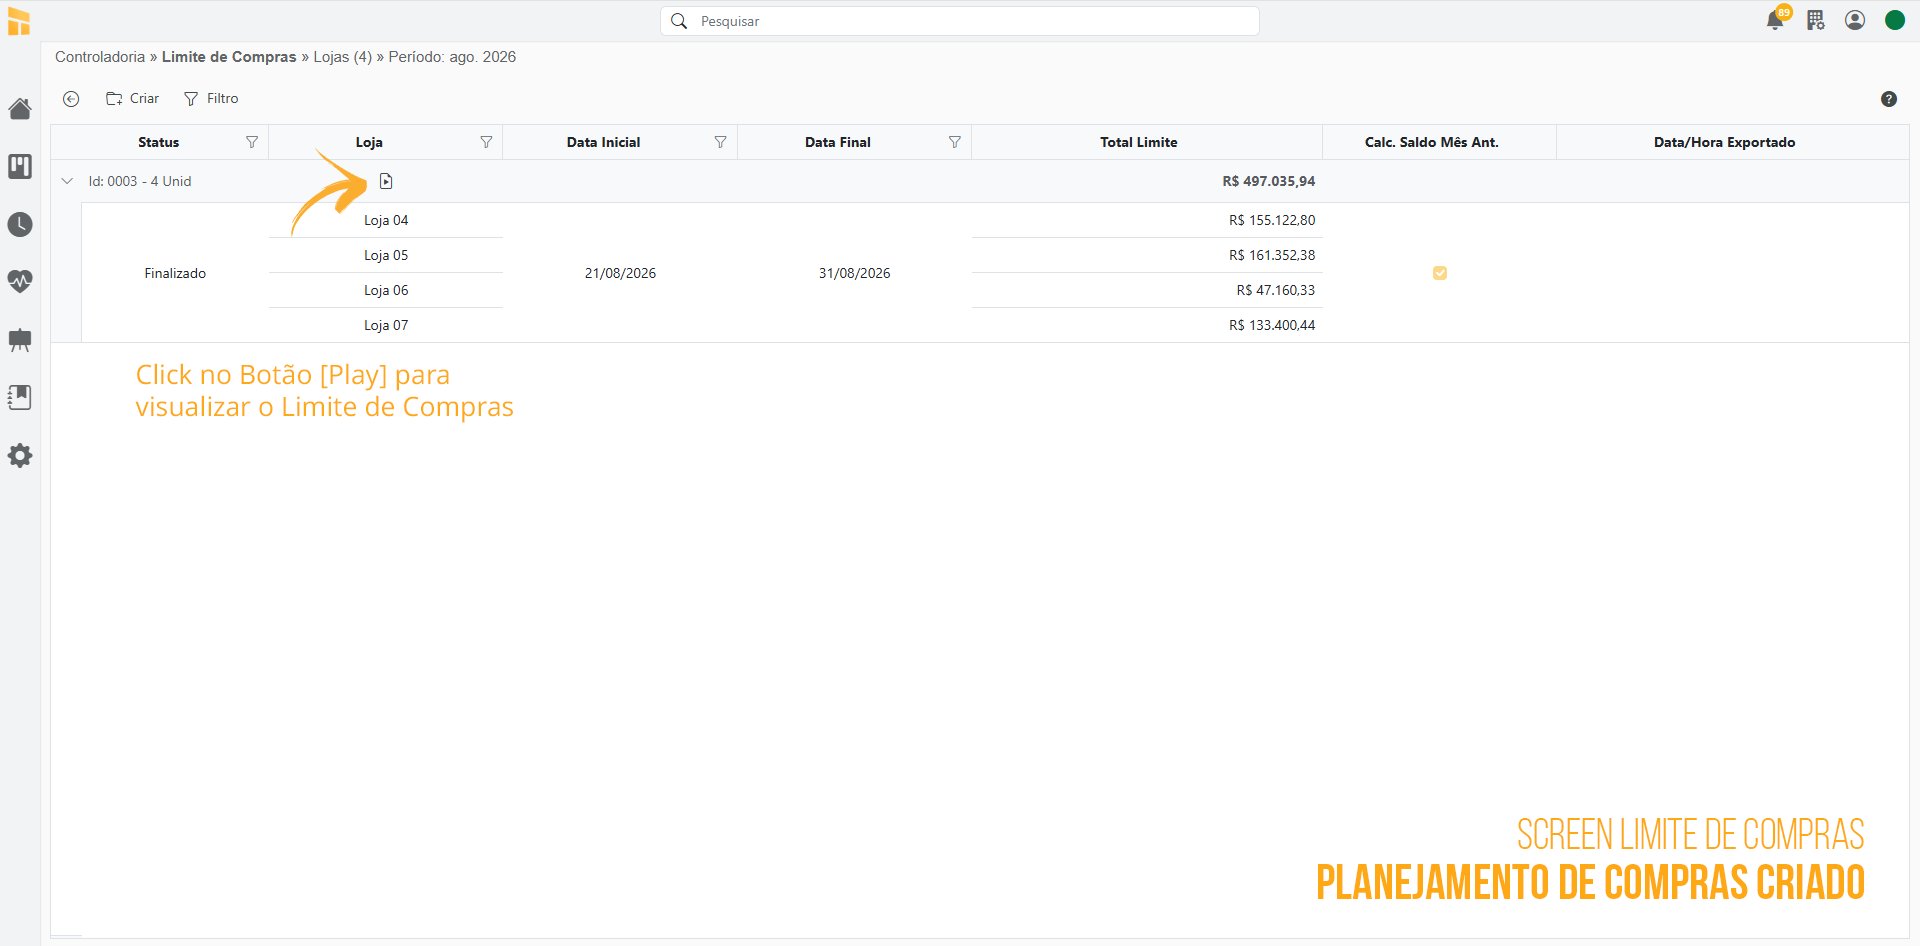
- Follow the steps shown in the images.
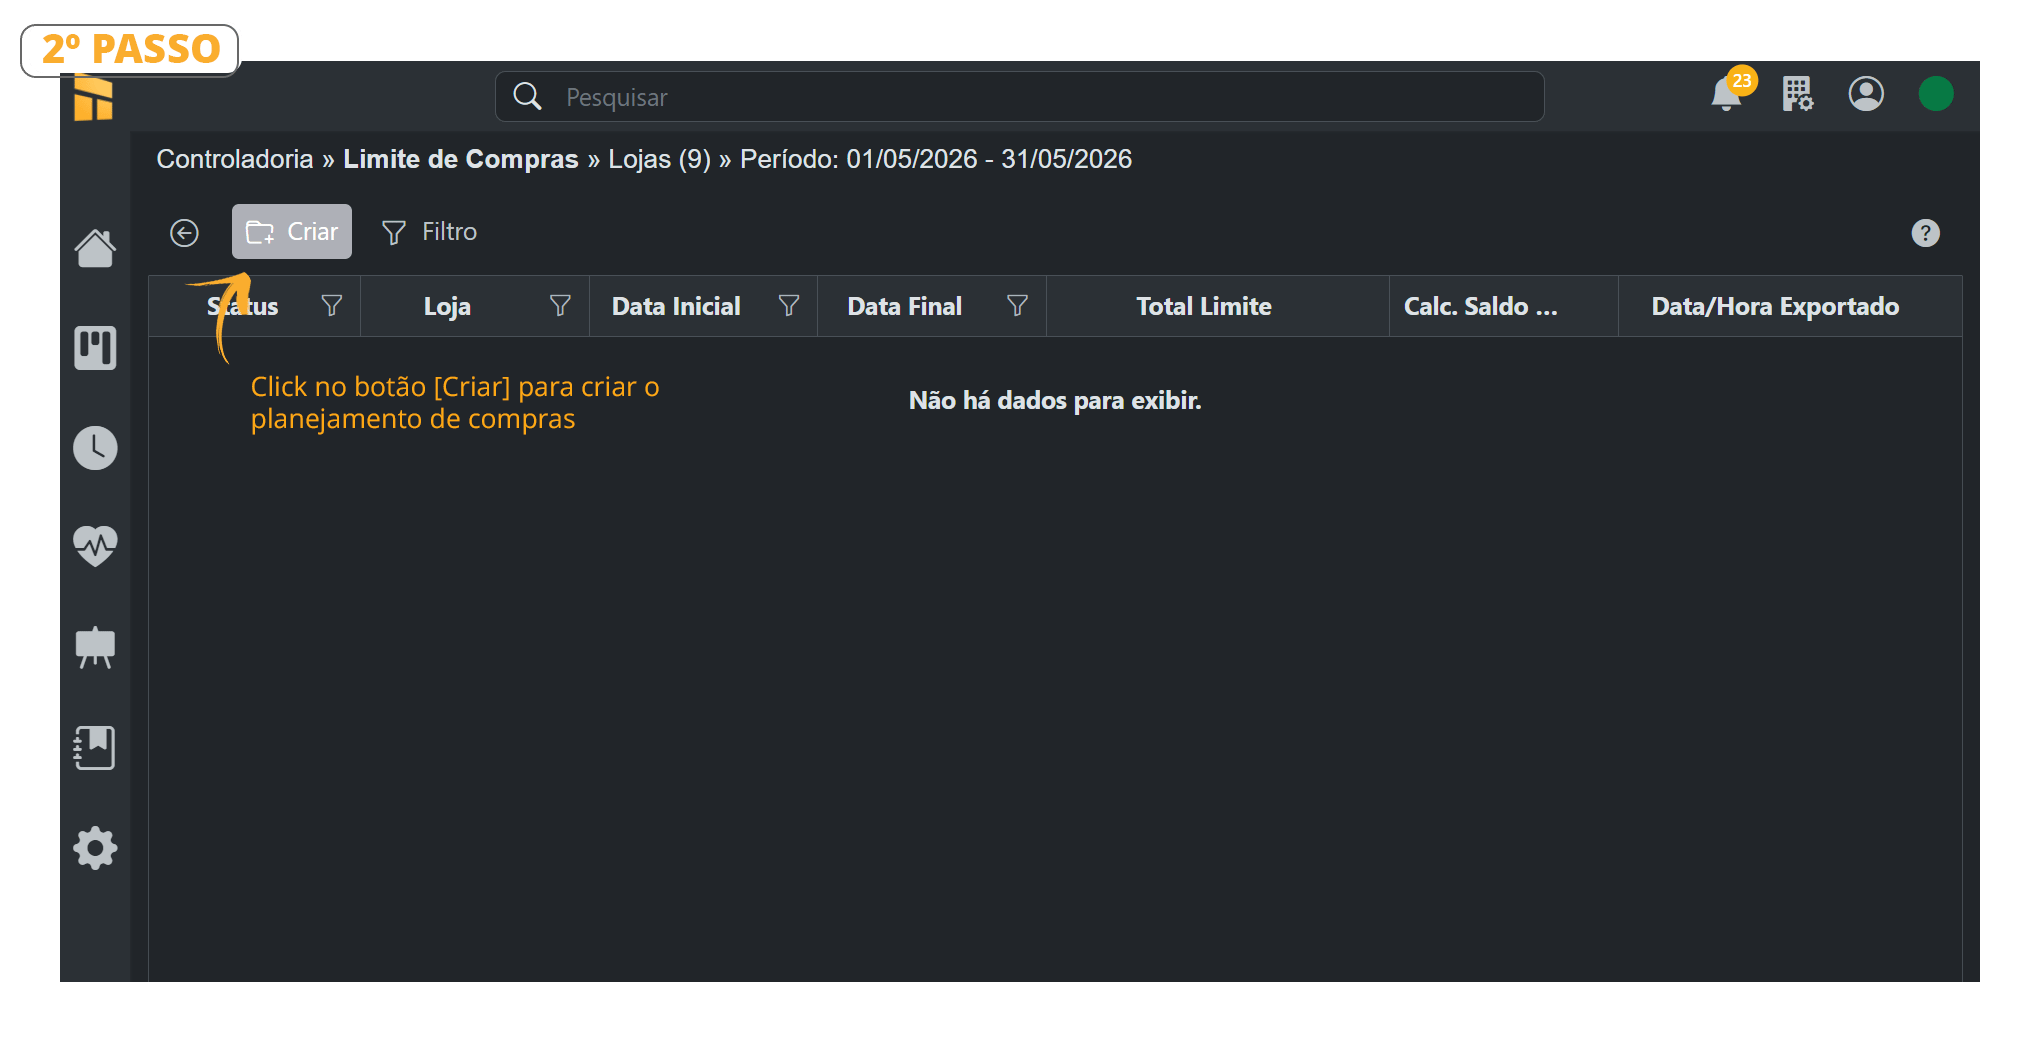
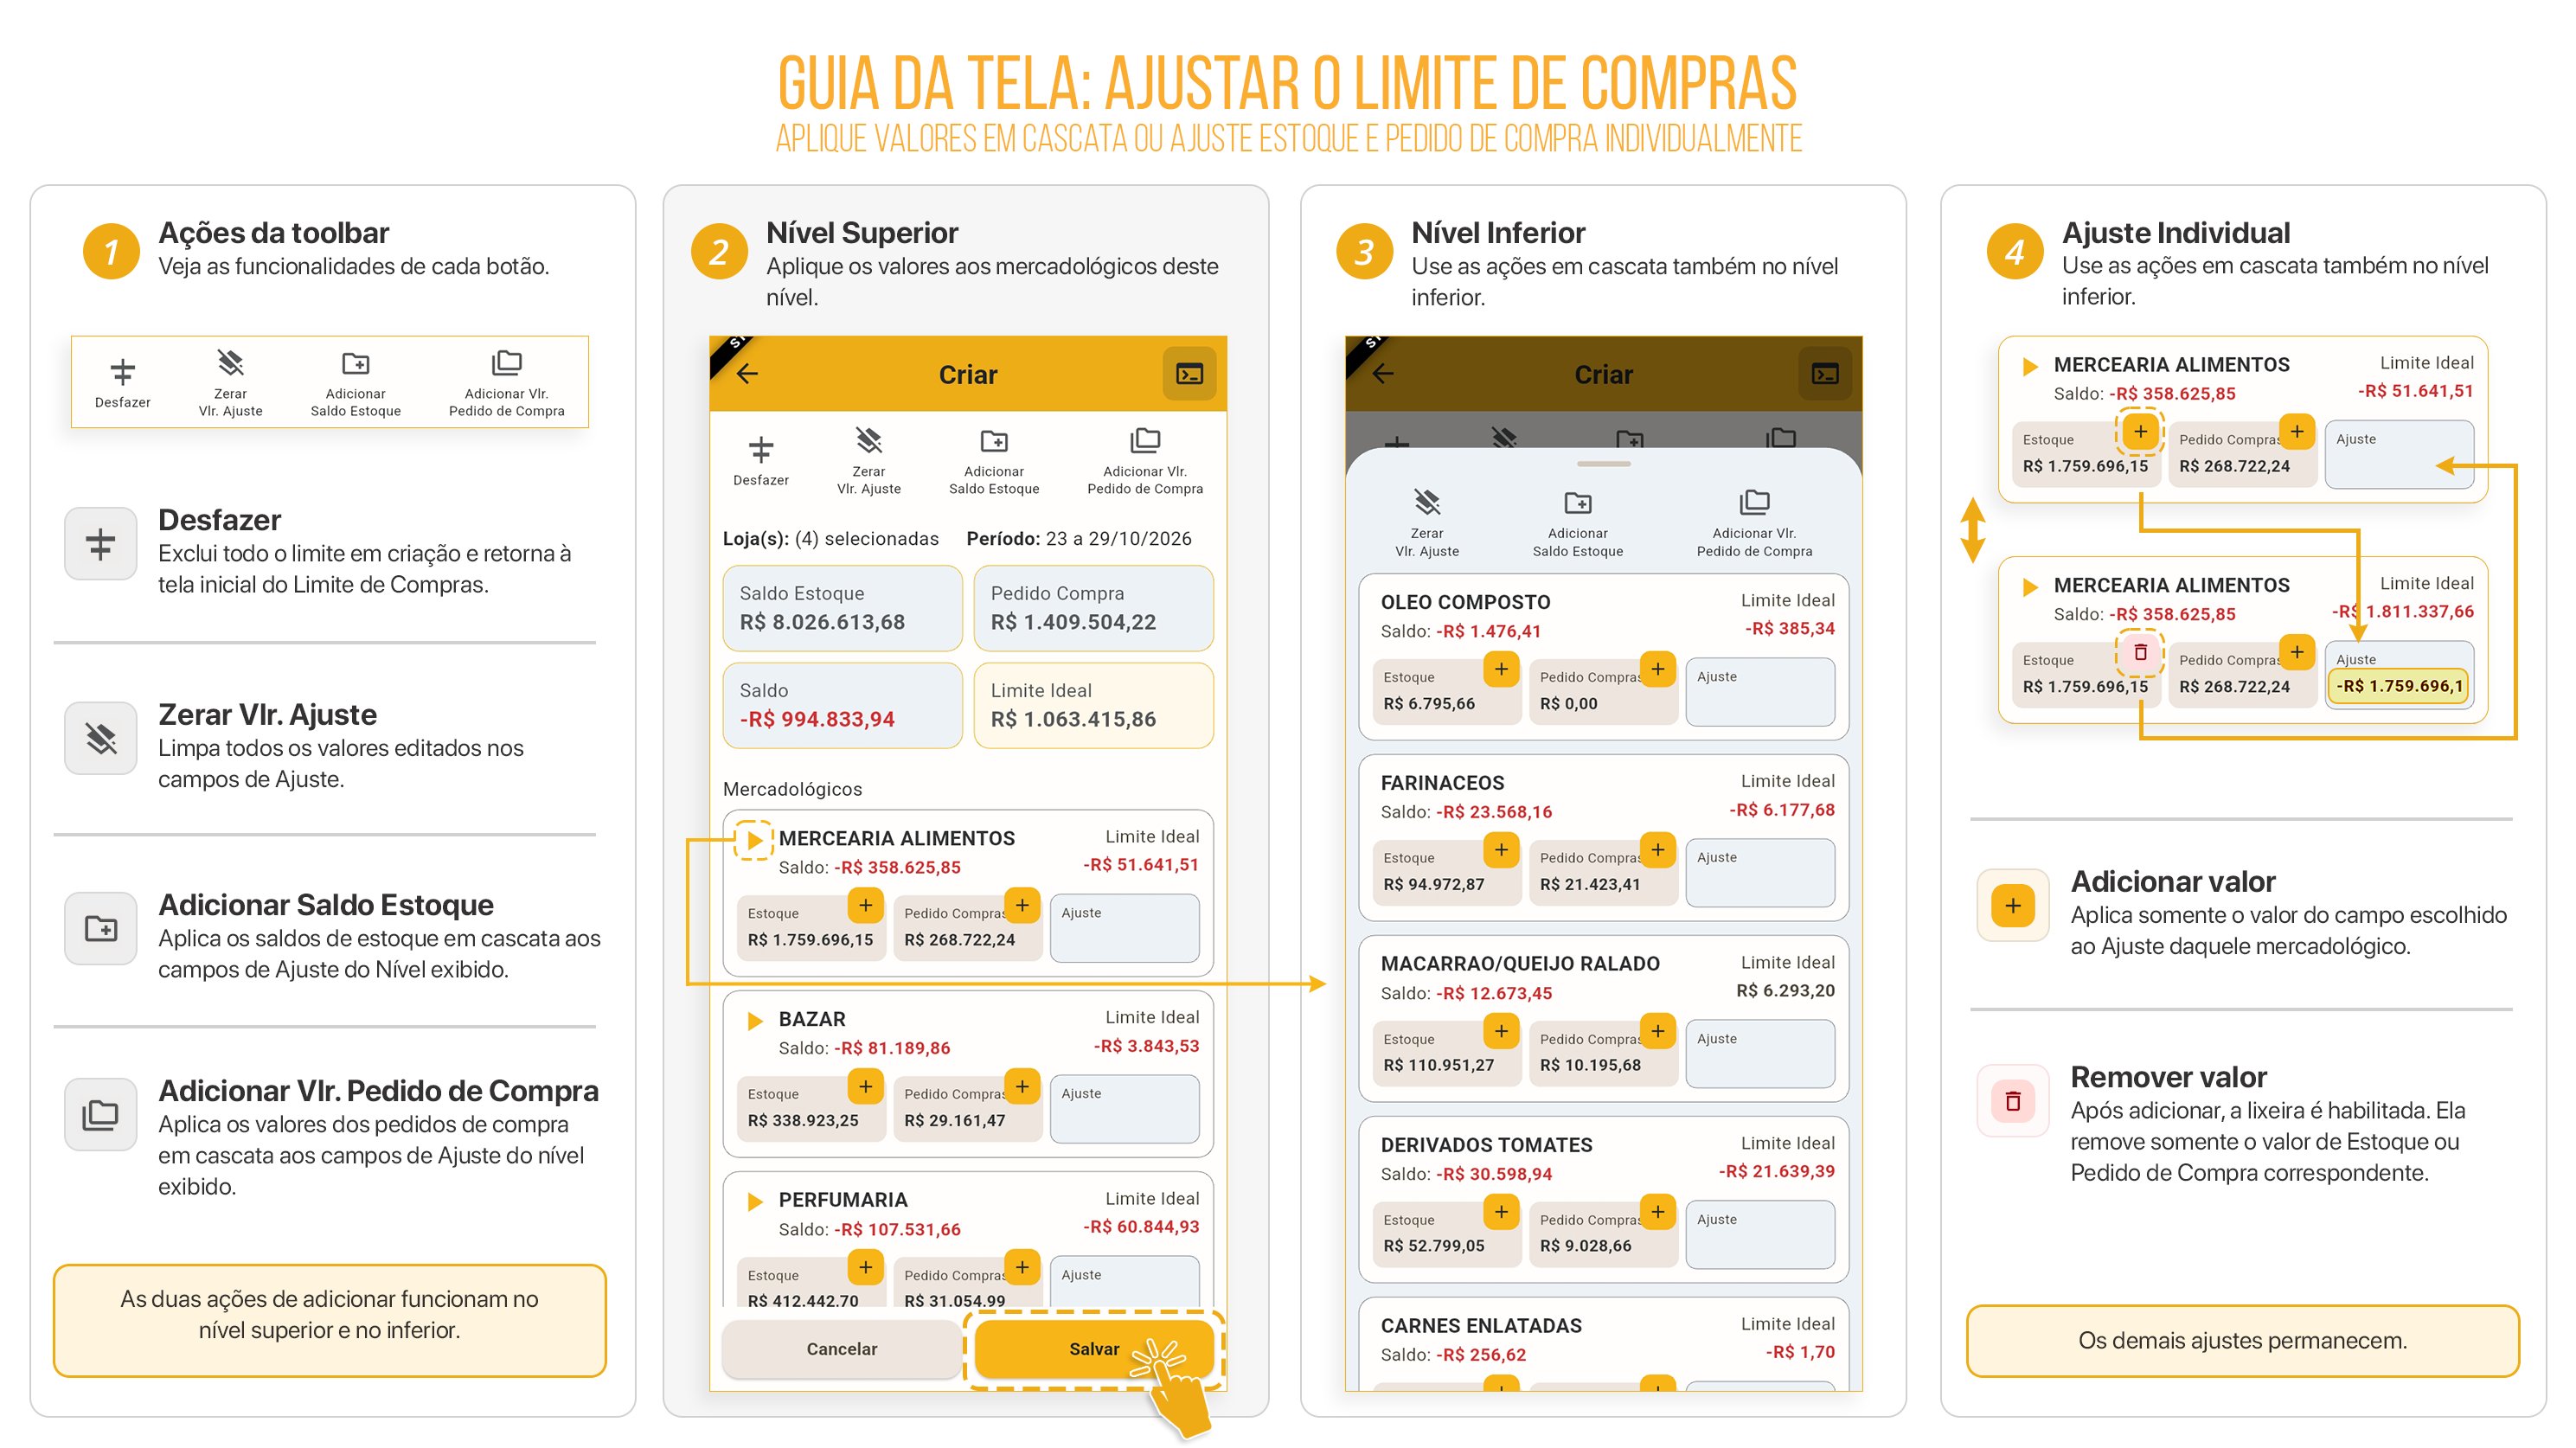
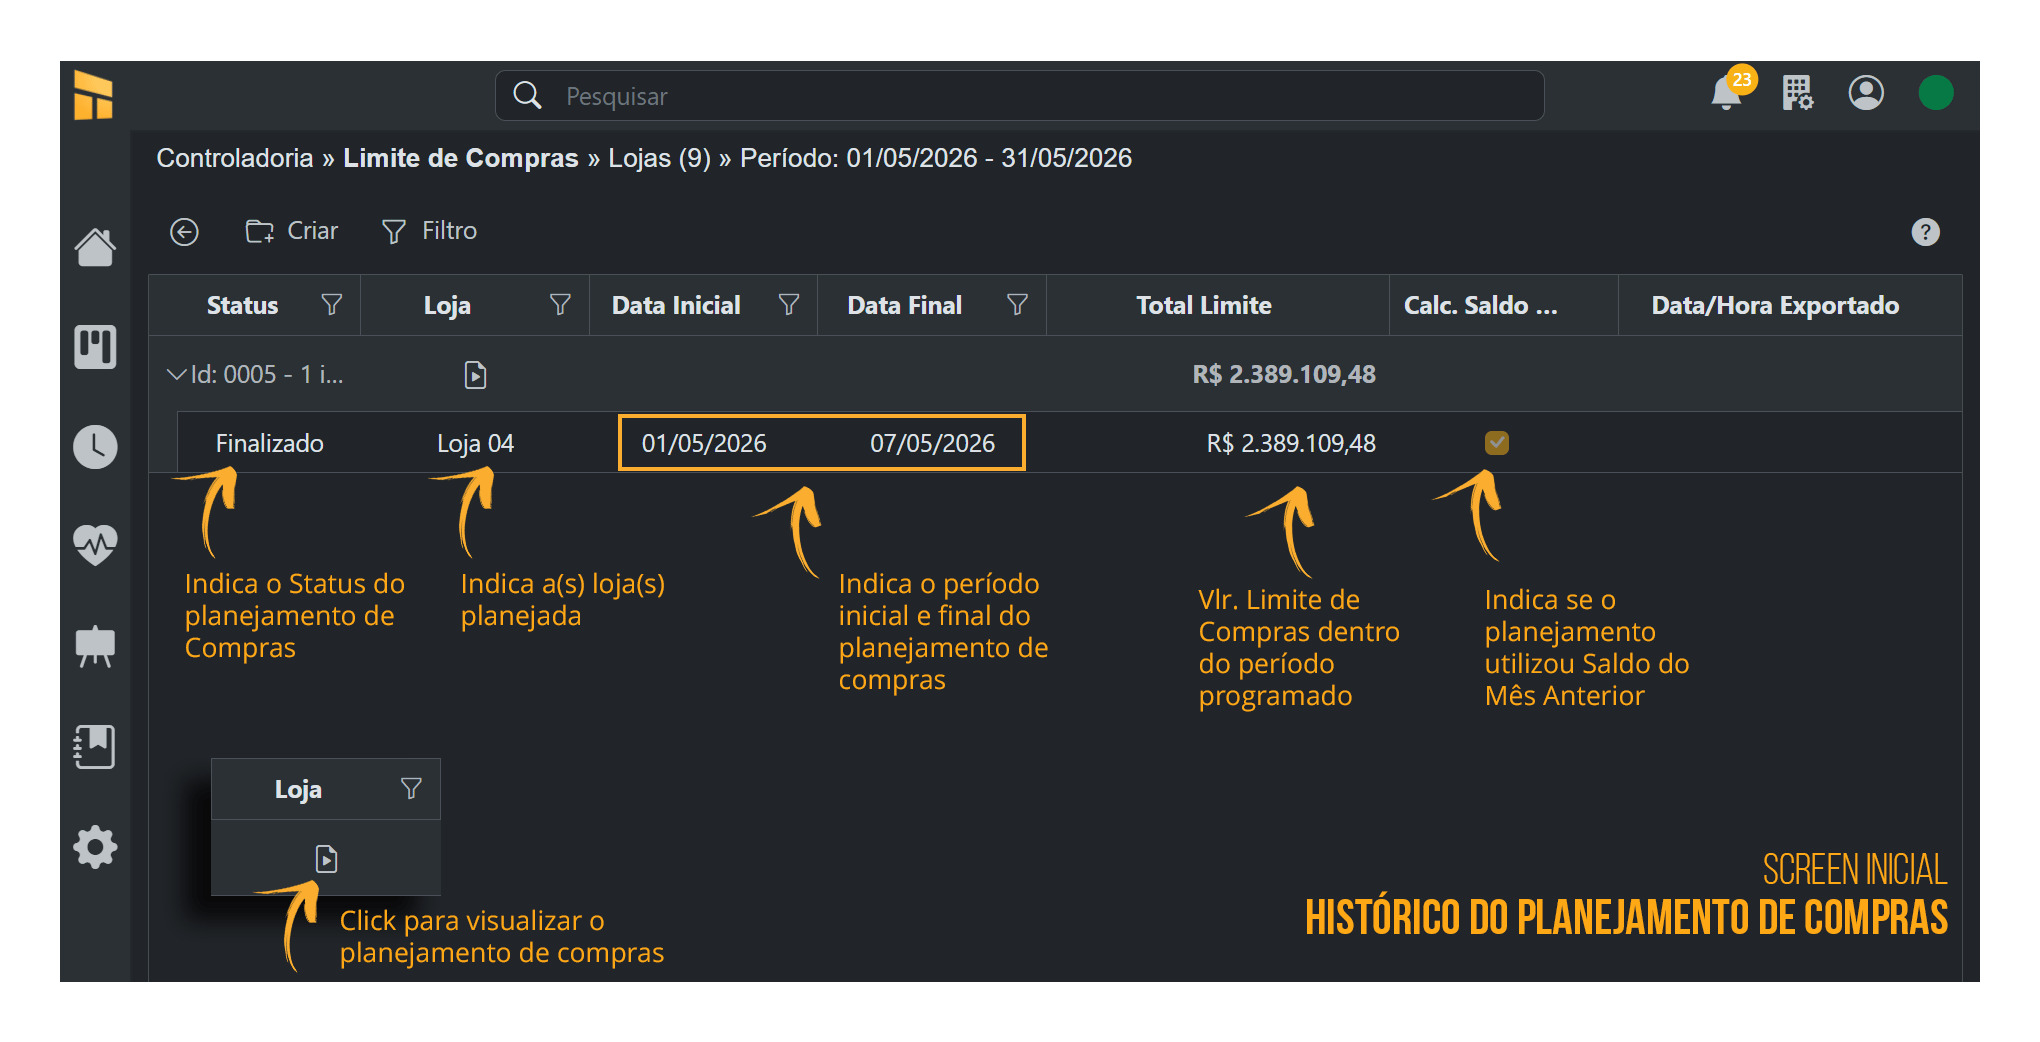
- See the details of each toolbar menu in the image below.
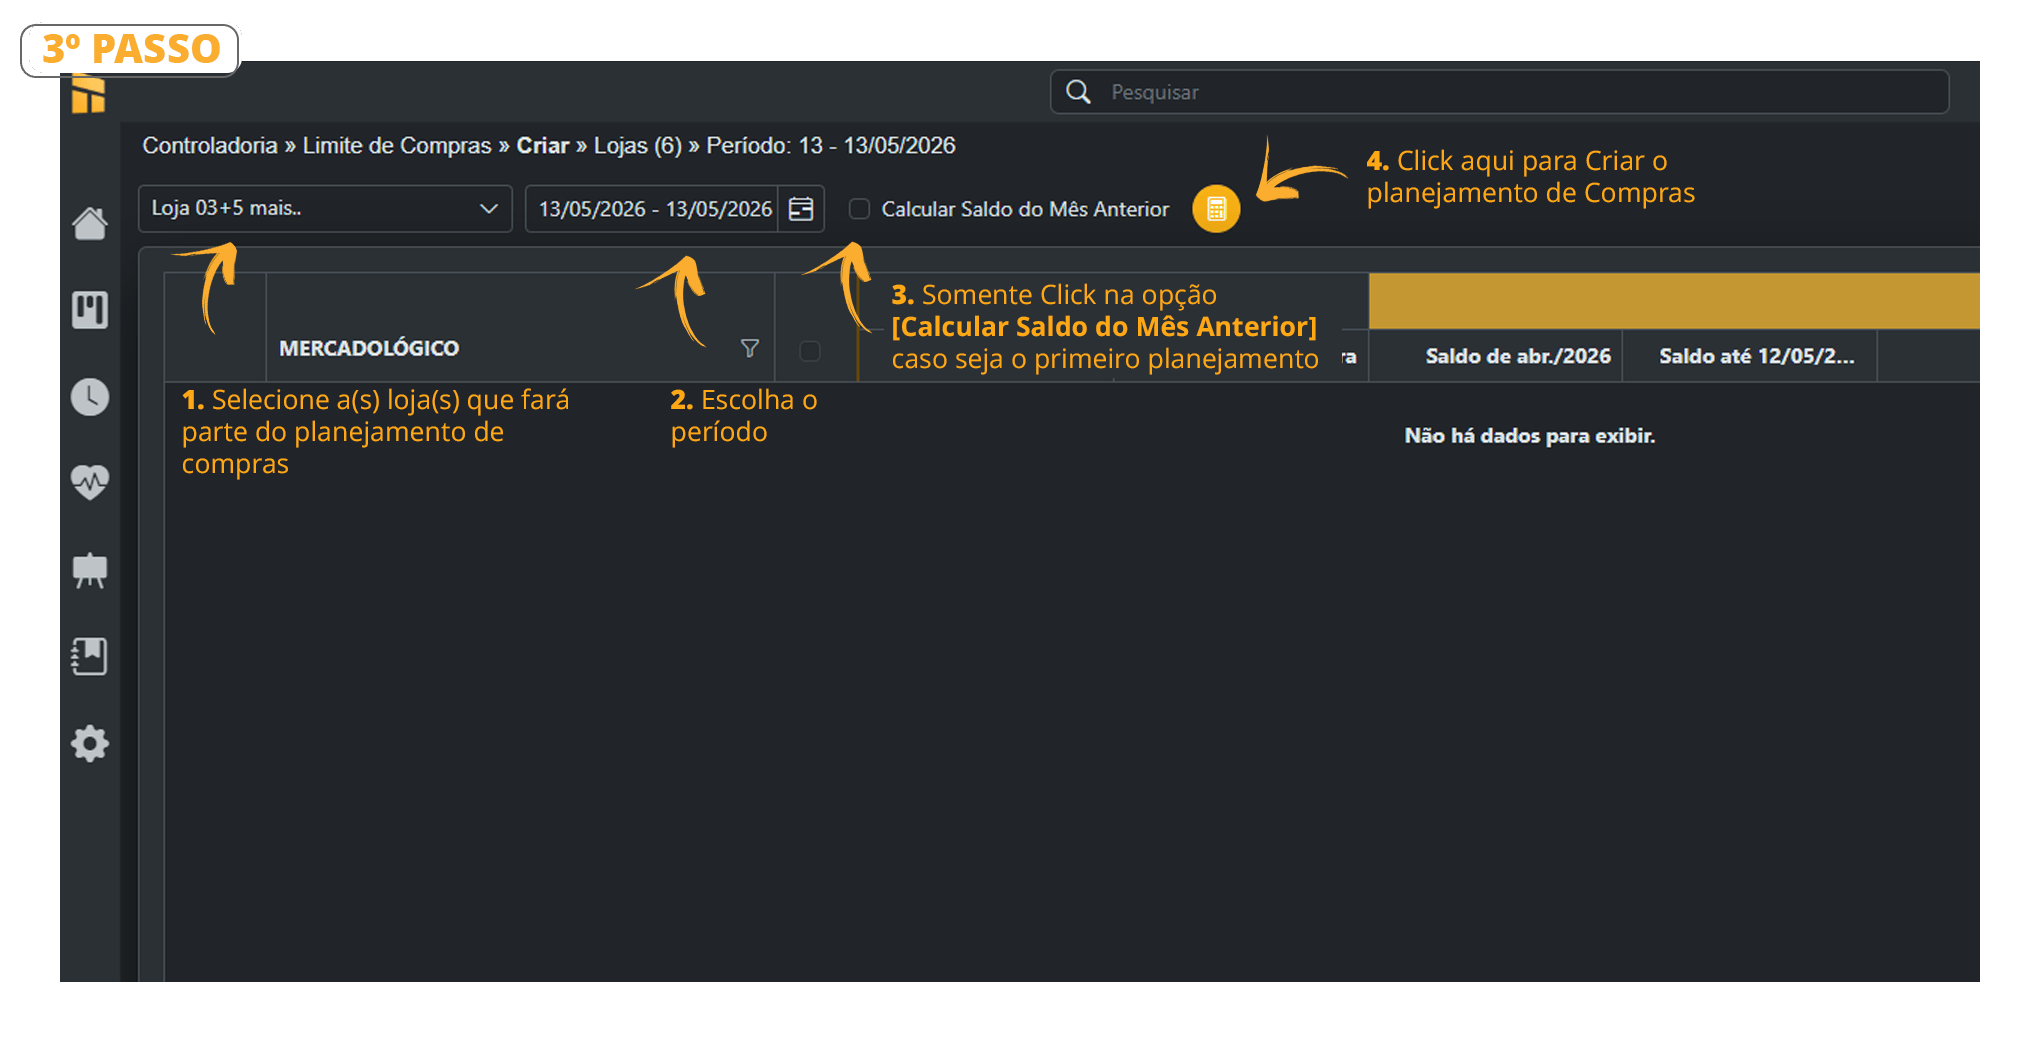
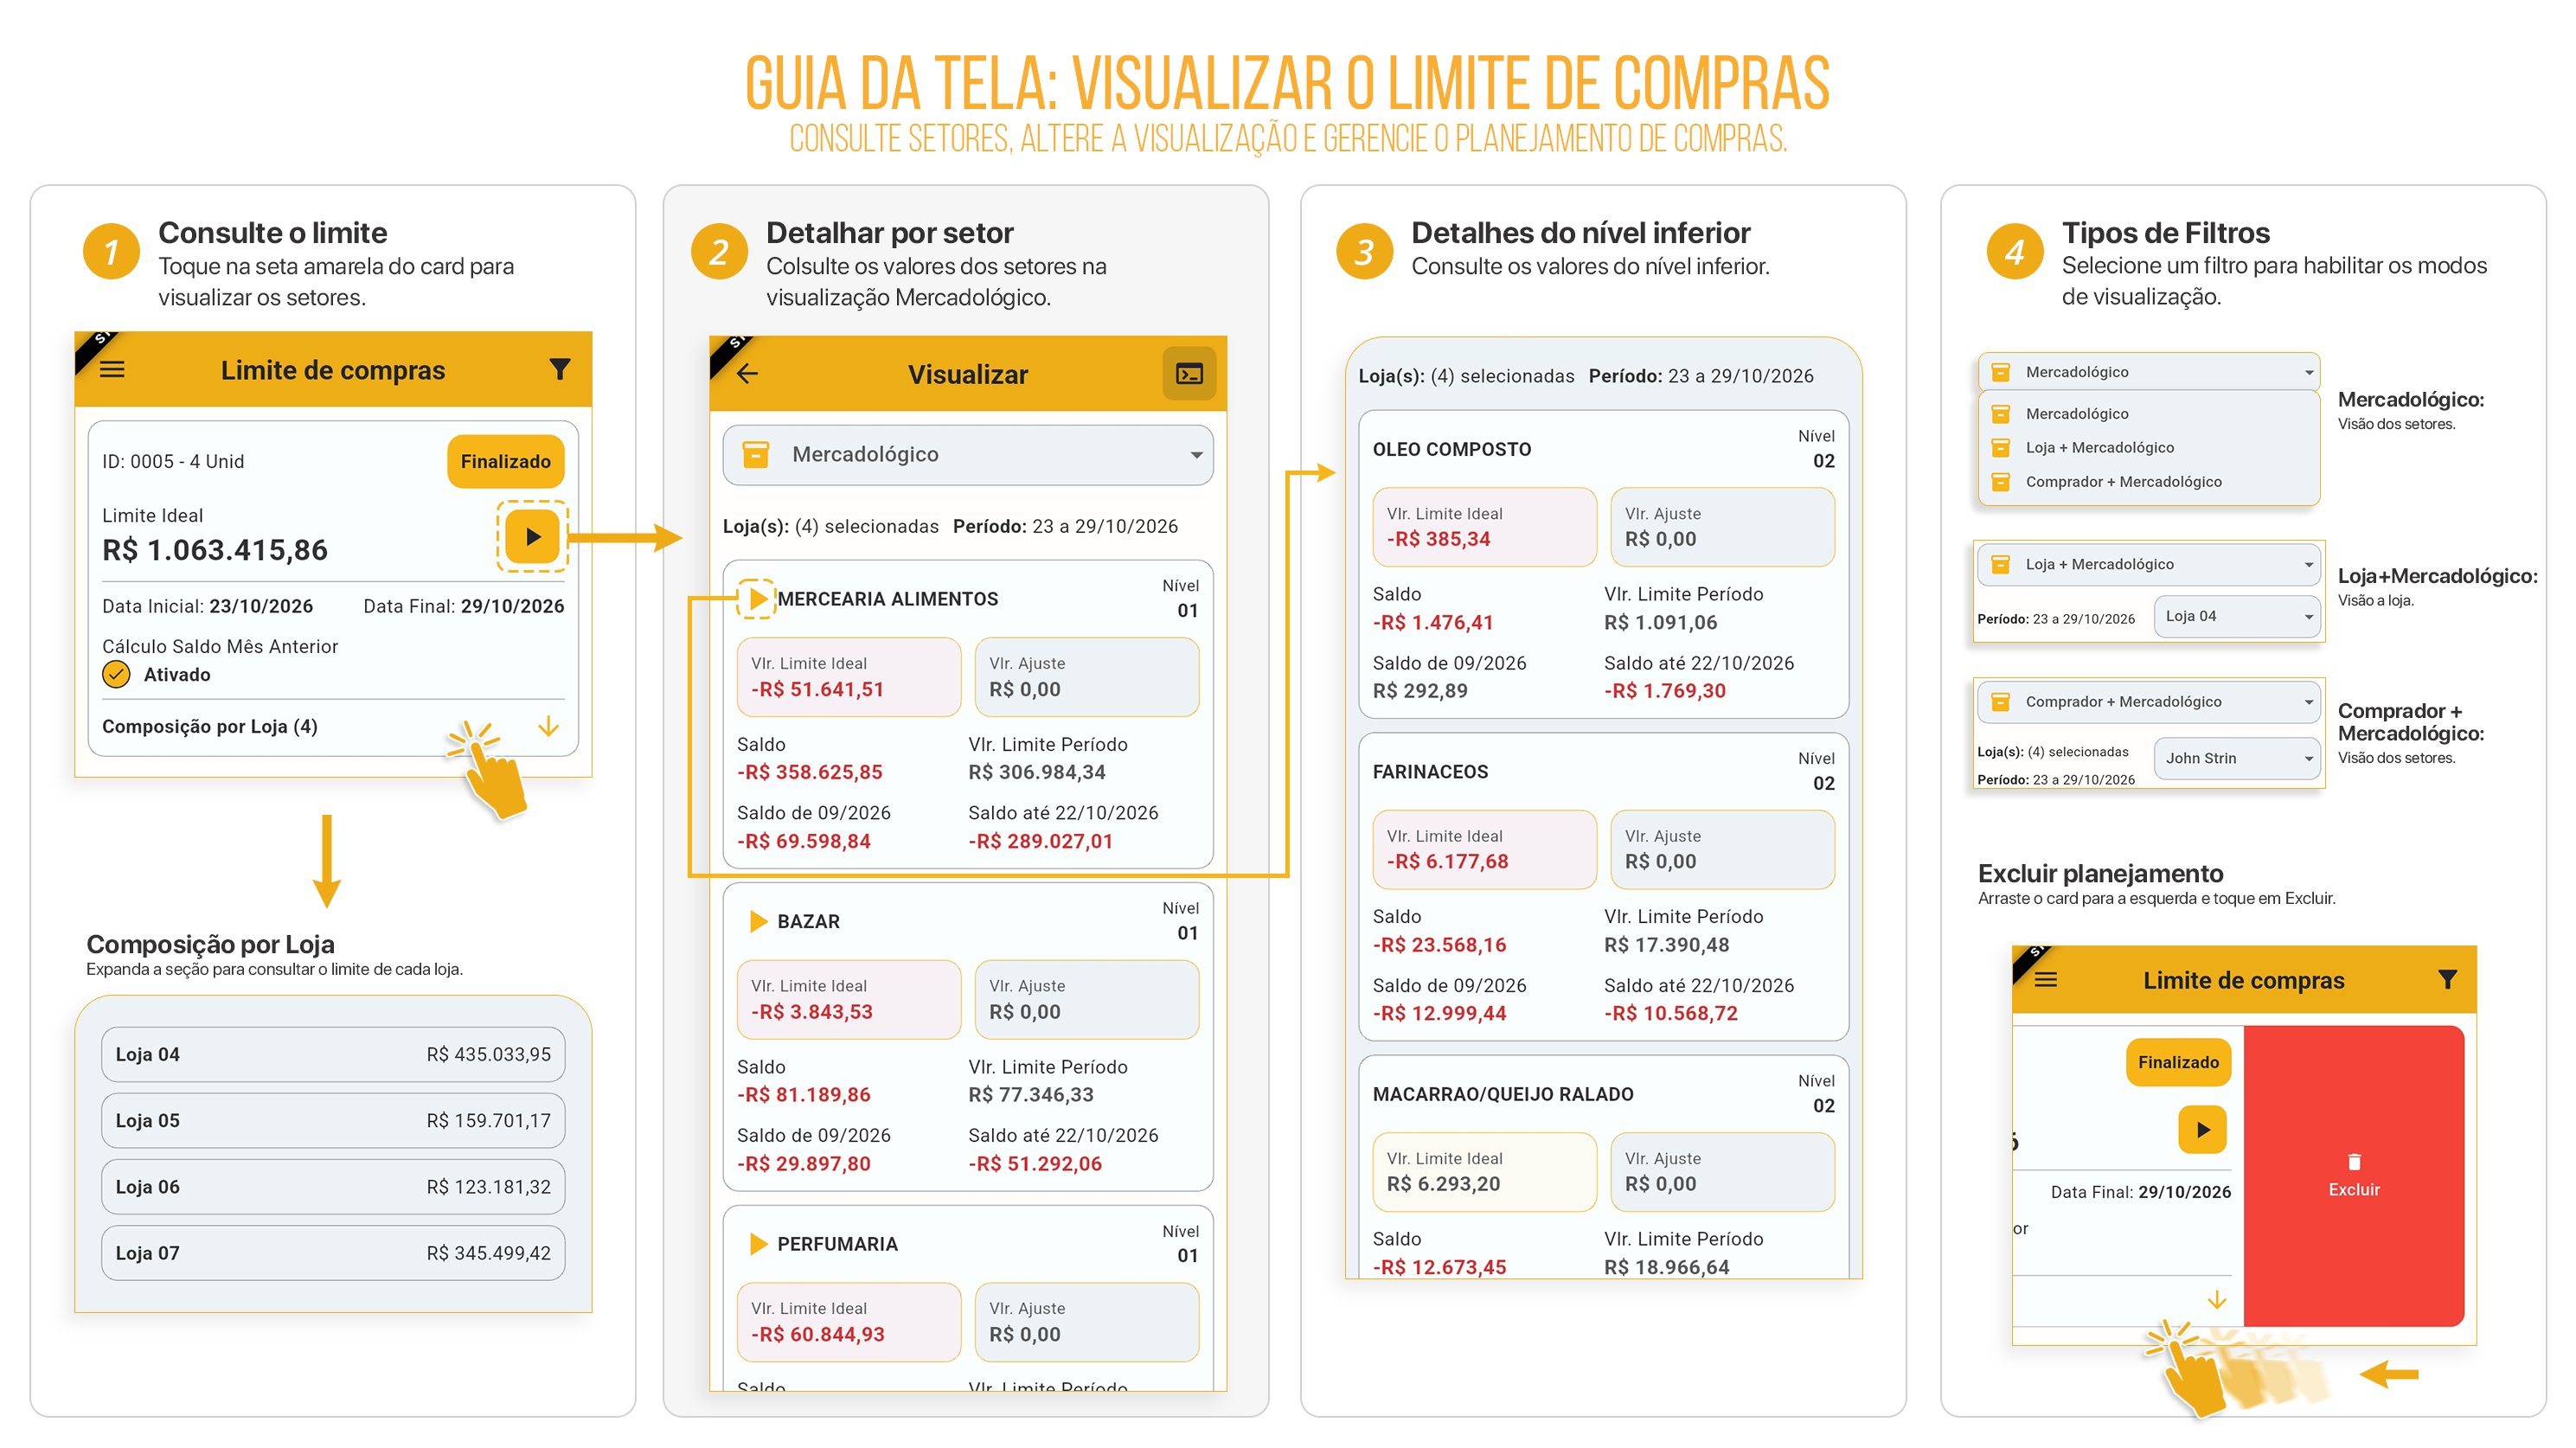
- See how to continue with the purchase plan and edit both the Upper Level and the Lower Level.
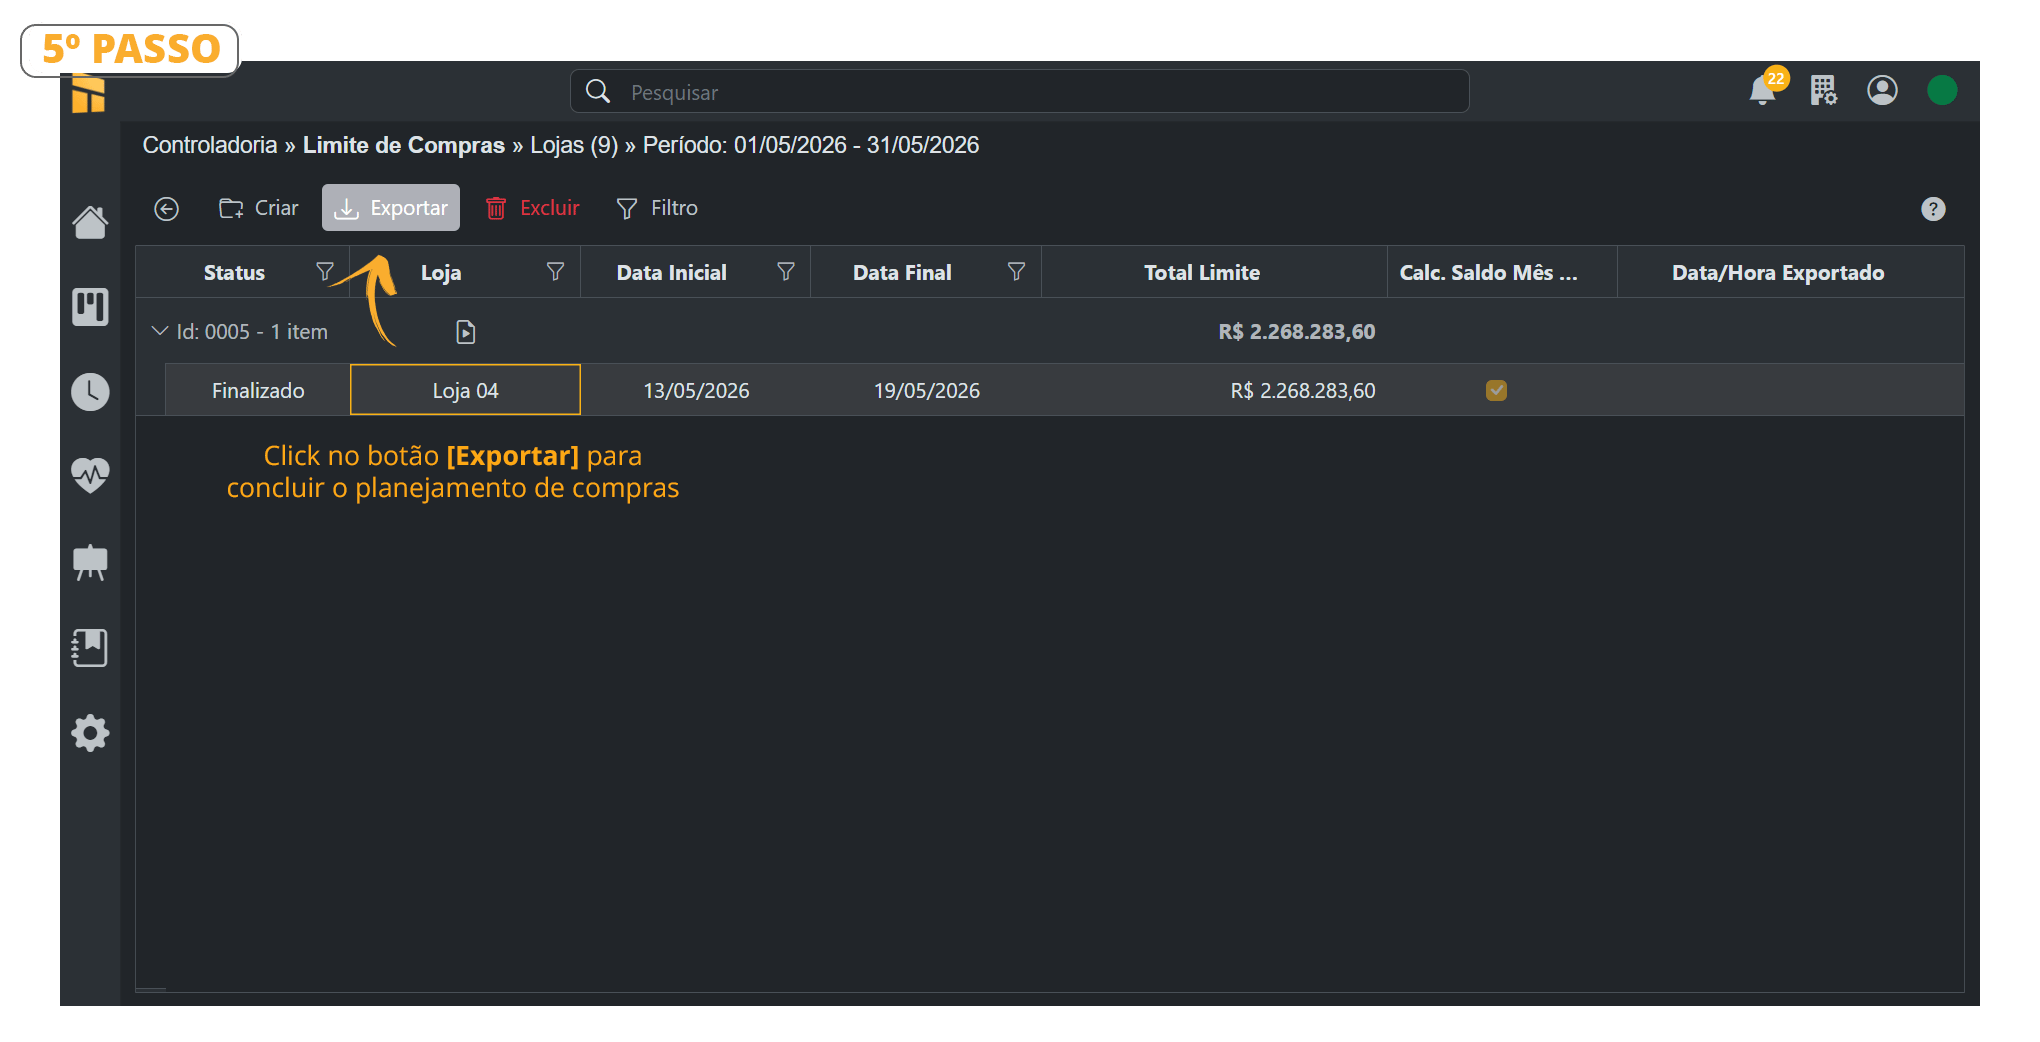
- To complete the Purchase Plan, click [Export].
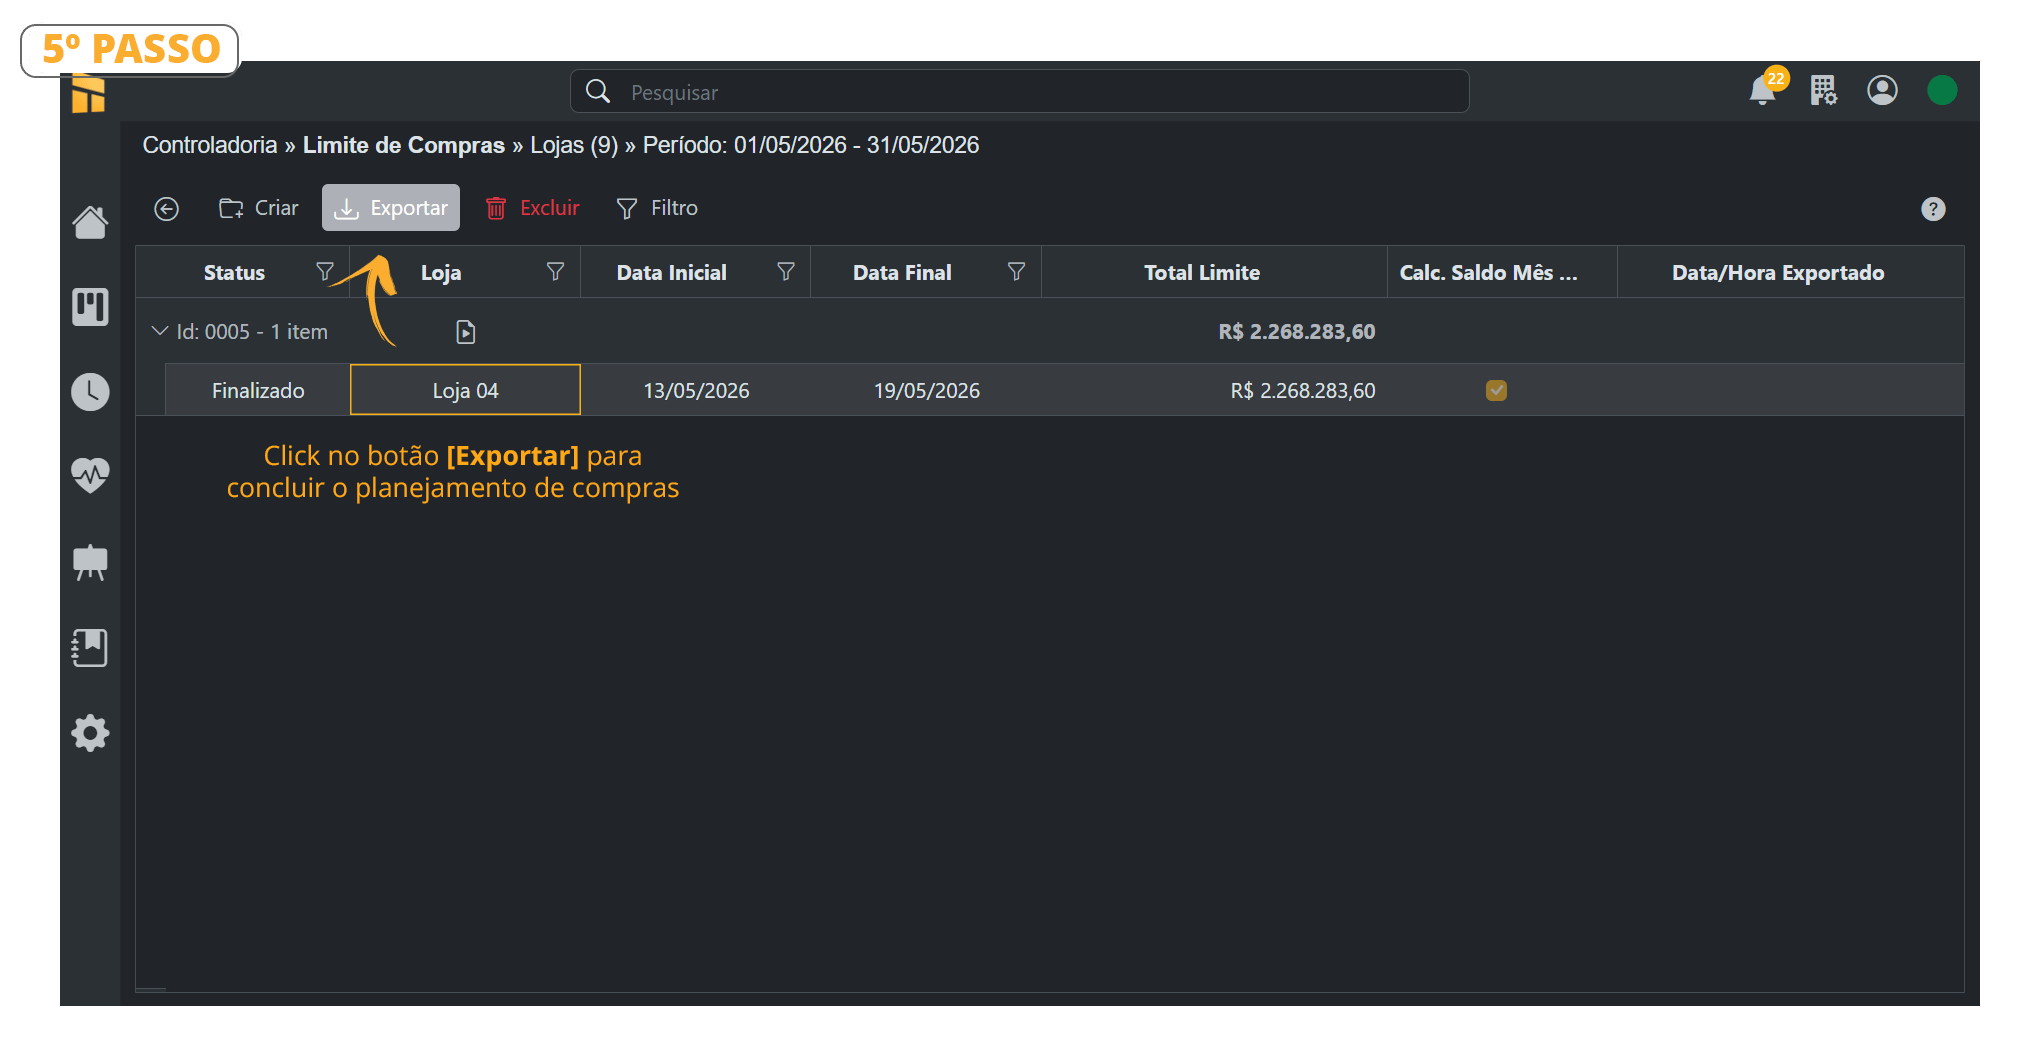
Export the Purchase Limit
Click here to watch the Complete Video with all the details.- Click the Export button, as indicated in the image. Follow these steps to send the Purchase Limit report to the ERP.

How to Export the “Purchase Limit” Report to PDF
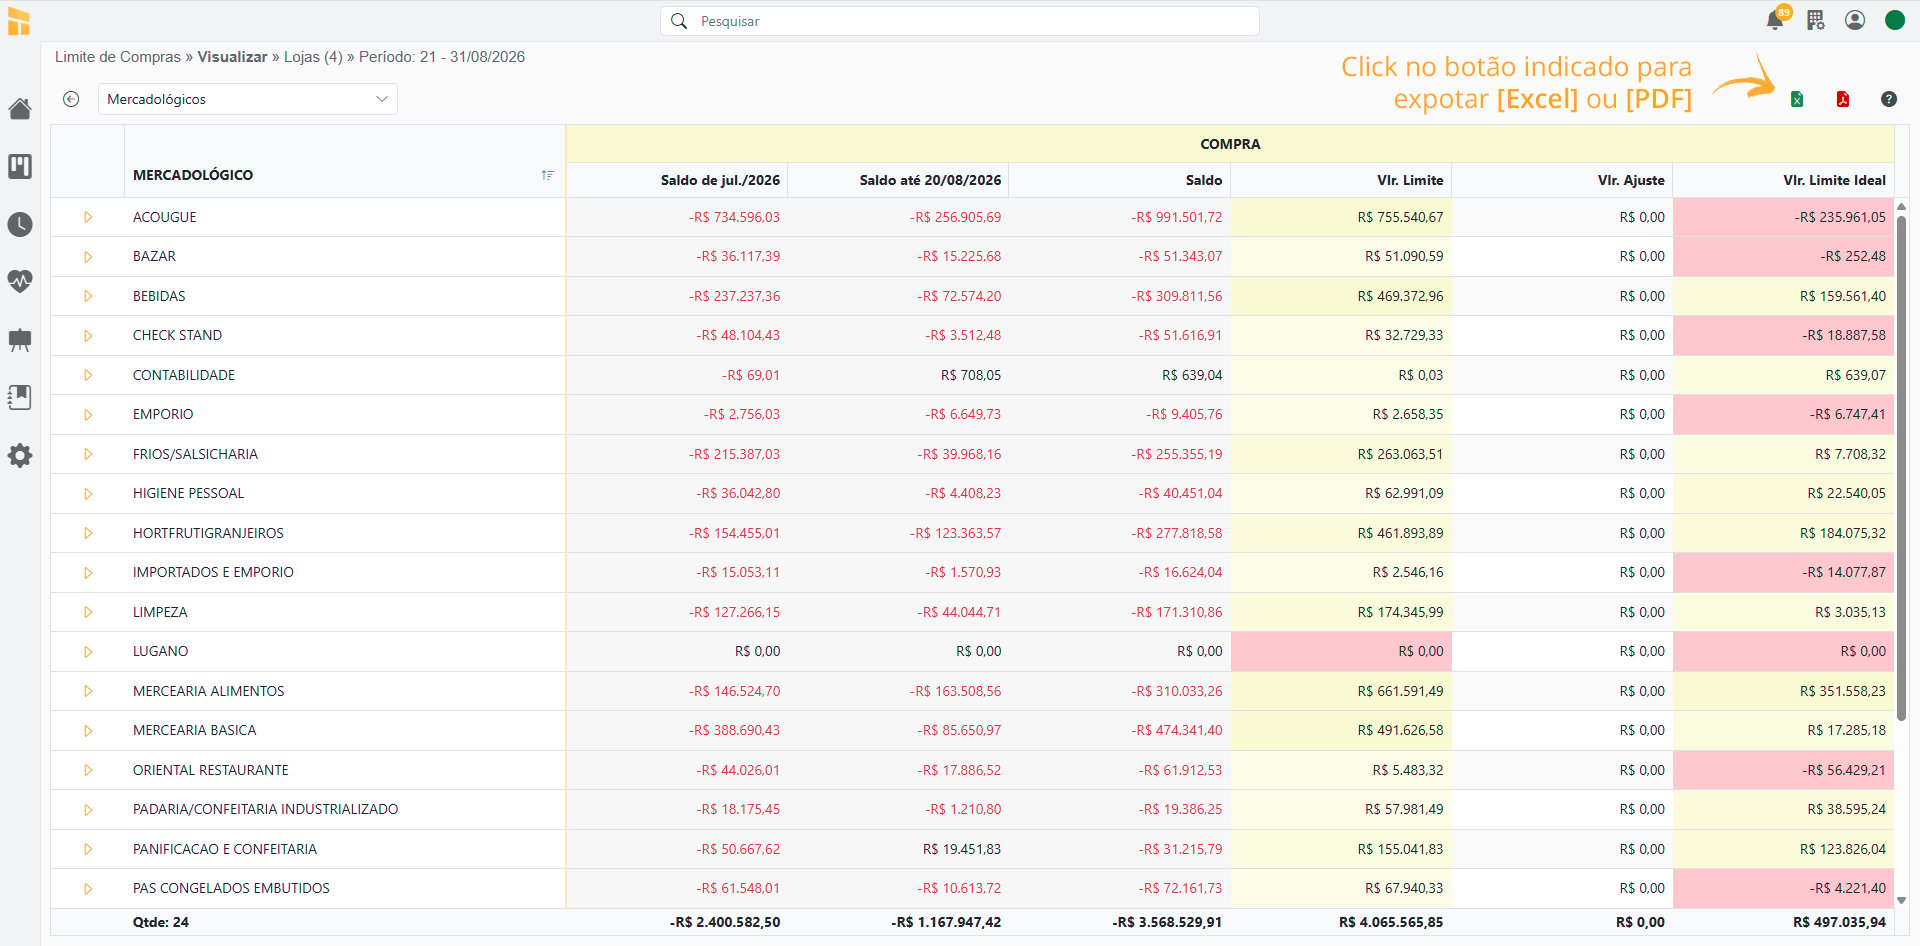
- See how to export a file to PDF below. The same procedure applies to EXCEL.
Column Details
See the meaning of each column in the Purchase Limit table.
How to Edit the Purchase Limit
Click here to watch the Complete Video with all the details.Purchase Limit editing is used when there is not enough purchase balance in a specific commercial category. This makes it possible to transfer amounts from one department to another to cover the shortage.Follow the step-by-step instructions below to edit the Purchase Limit.- Controllership > Purchase Limit

Understanding the Toolbar
-
Select the stores and the period. For the first plan, select Calculate Previous Month Balance and click the icon to create the plan.
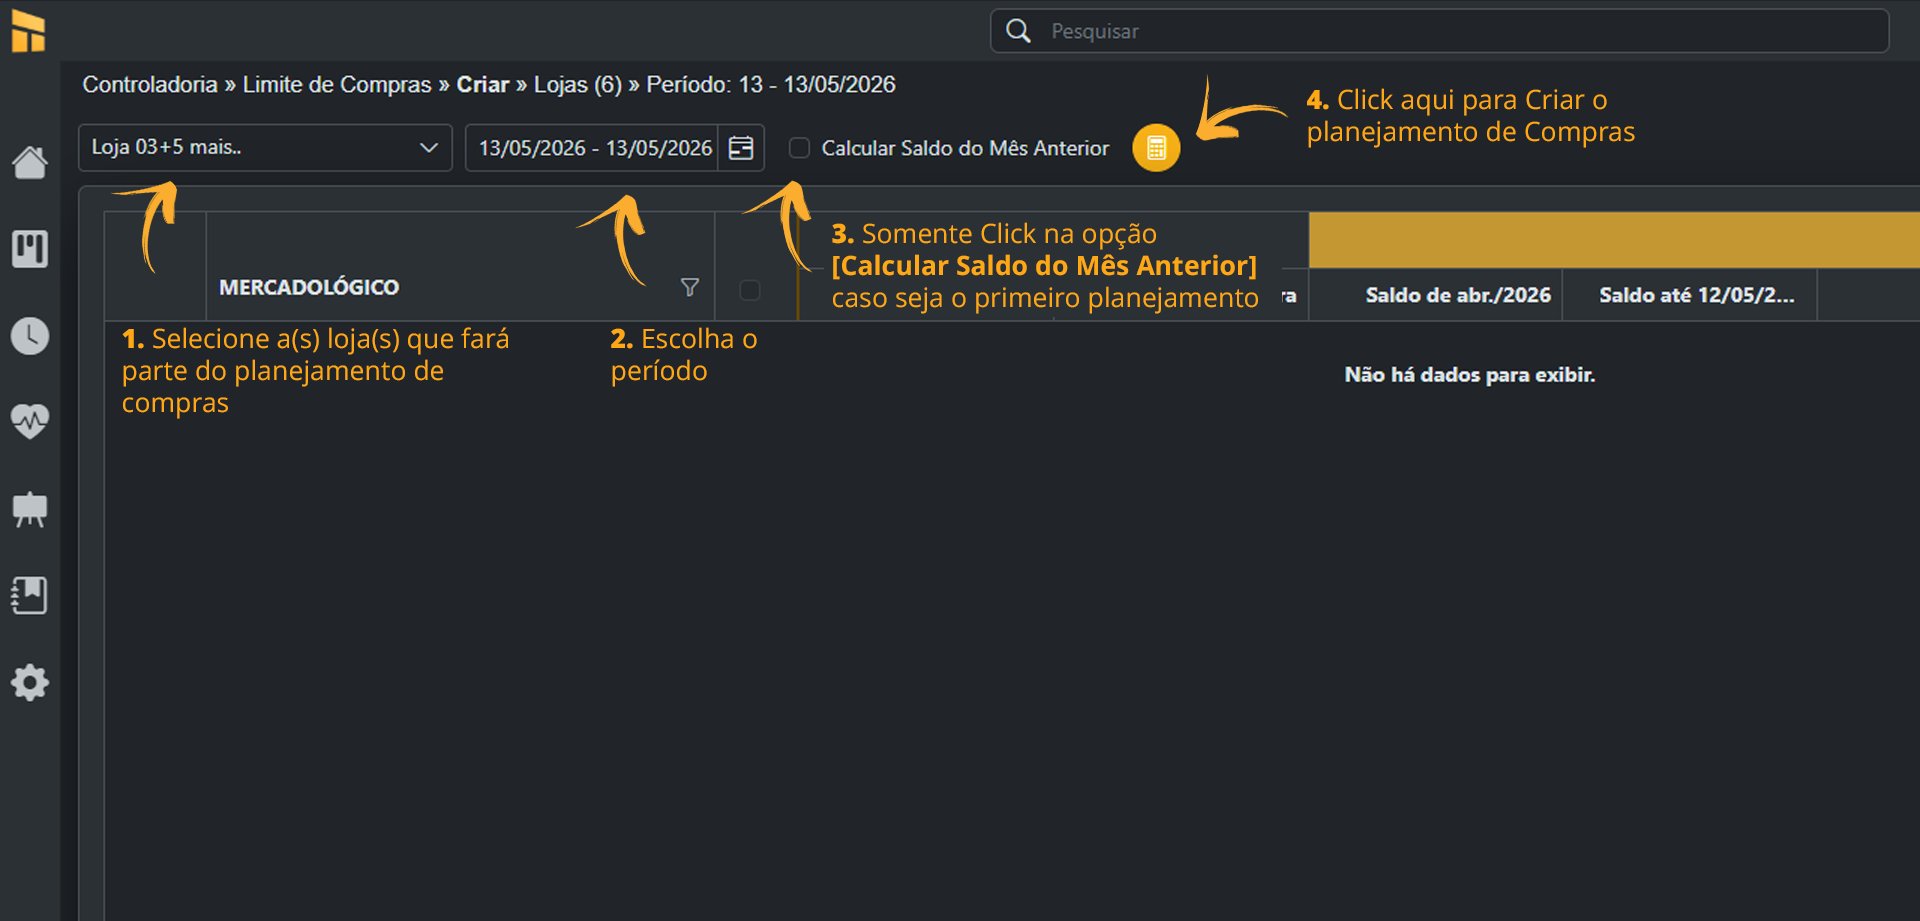
- Select the department and specify whether the adjustment should consider the inventory balance or the purchase order. Use the Adjustment Amount column and click Save.

-
The image shows the final stage of the purchase plan. Click Export to complete the process.
How to Activate the Purchase Limit Workflow
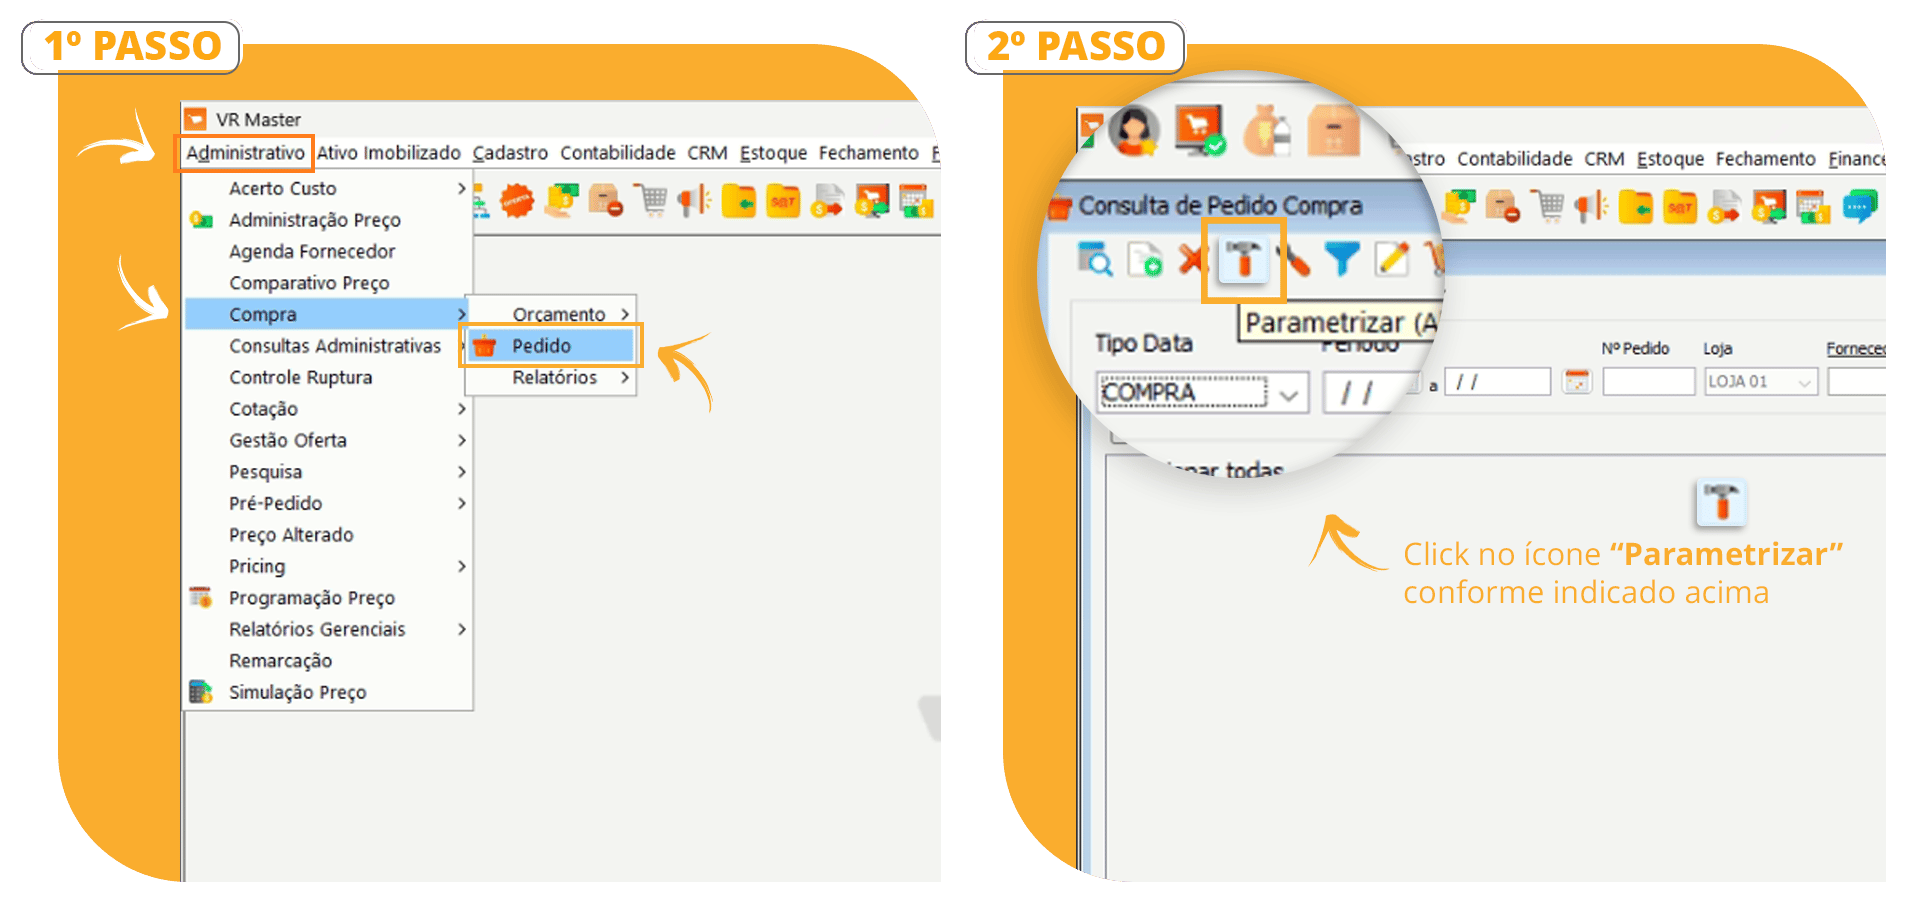
When exporting the Purchase Limit to the ERP, we must ensure that the buyer does not exceed the limit. To do this, we must activate the controls that automatically prevent excess purchases.To activate these controls in the ERP, follow the steps below:- Click Administrative / Purchases / Order.
- Then click Configure.

Purchase Limit Calculation
When creating the Budget or Strategic Plan, the initial calculation of the Controller360 Purchase Limit considers:[Sales Target] x [% Budgeted COGS] + [Loss] + [Breakage] + [Consumption] (these should only be considered when calculated controls are available). These amounts are calculated based on the result of [Sales Target] x [% Budgeted COGS].Note: The percentages used to calculate Loss, Breakage, and Consumption come from the Budget.Purchase Limit Calculation without Loss, Breakage, and Consumption:
[Sales Target Amount] x [% Budgeted COGS] = Purchase Limit AmountPurchase Limit Calculation including Loss, Breakage, and Consumption:
[Purchase Limit Amount] x [% Loss] = [P]
[Purchase Limit Amount] x [% Breakage] = [Q]
[Purchase Limit Amount] x [Consumption] = [C]
[Purchase Limit Amount] + [P] + [Q] + [C] = Final Purchase Limit Amount
Calculate Loss, Breakage, and Consumption? NO
Calculate Loss, Breakage, and Consumption? YES

After sales occur, the calculation remains the same. Only the [Sales Target Amount] is replaced by the [Actual Sales Amount].